SSH Connection

How to Install SSH Connector on Ubuntu and Debian
Here, I’ll show you how to connect to your Linux system using SSH and how to connect with root privileges.
1. Establish a graphical connection
If you have a physical server, connect a monitor if you haven’t already. If you’re using a virtualized machine, use the graphical interface to view the desktop.
2. Open Terminal
First, we update the system to ensure we can download all the packages. We simply type the command into the window and then enter your user password.
sudo apt update -y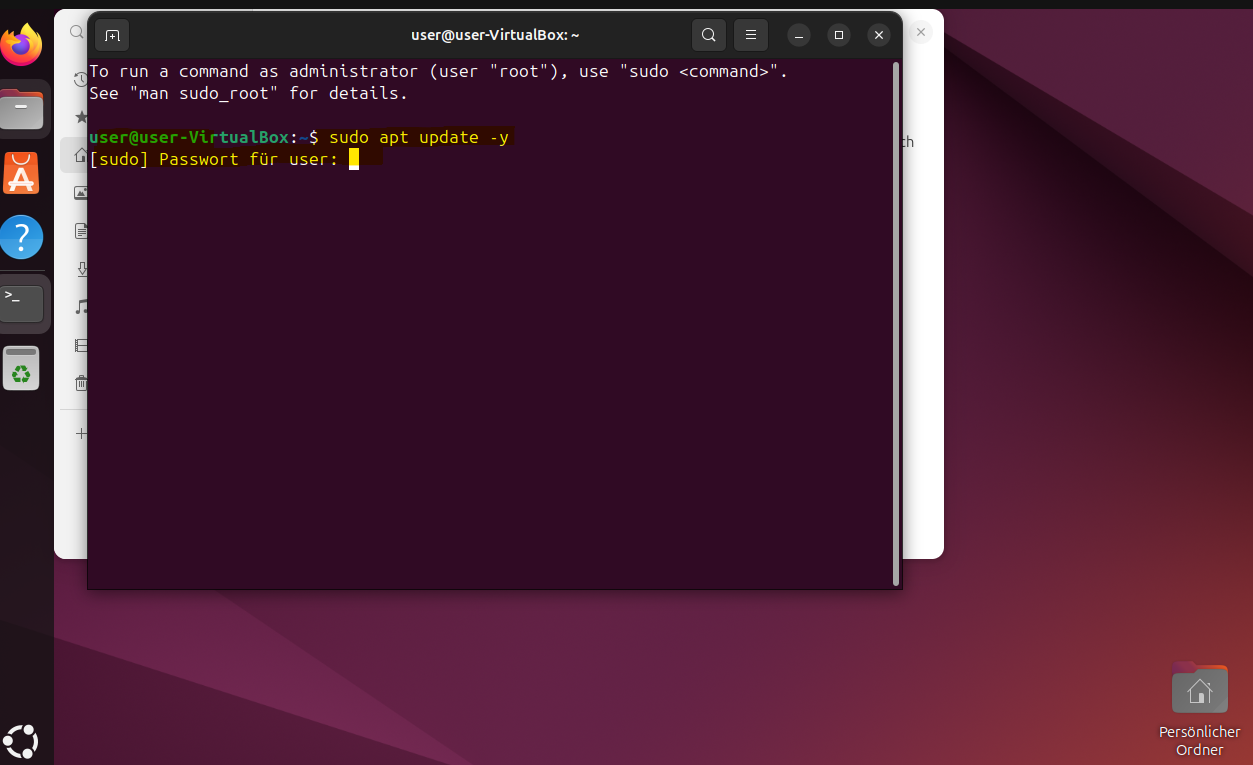
3. Install SSH Server
Now, we install the SSH server; this service enables access via SSH.
sudo apt install openssh-server -y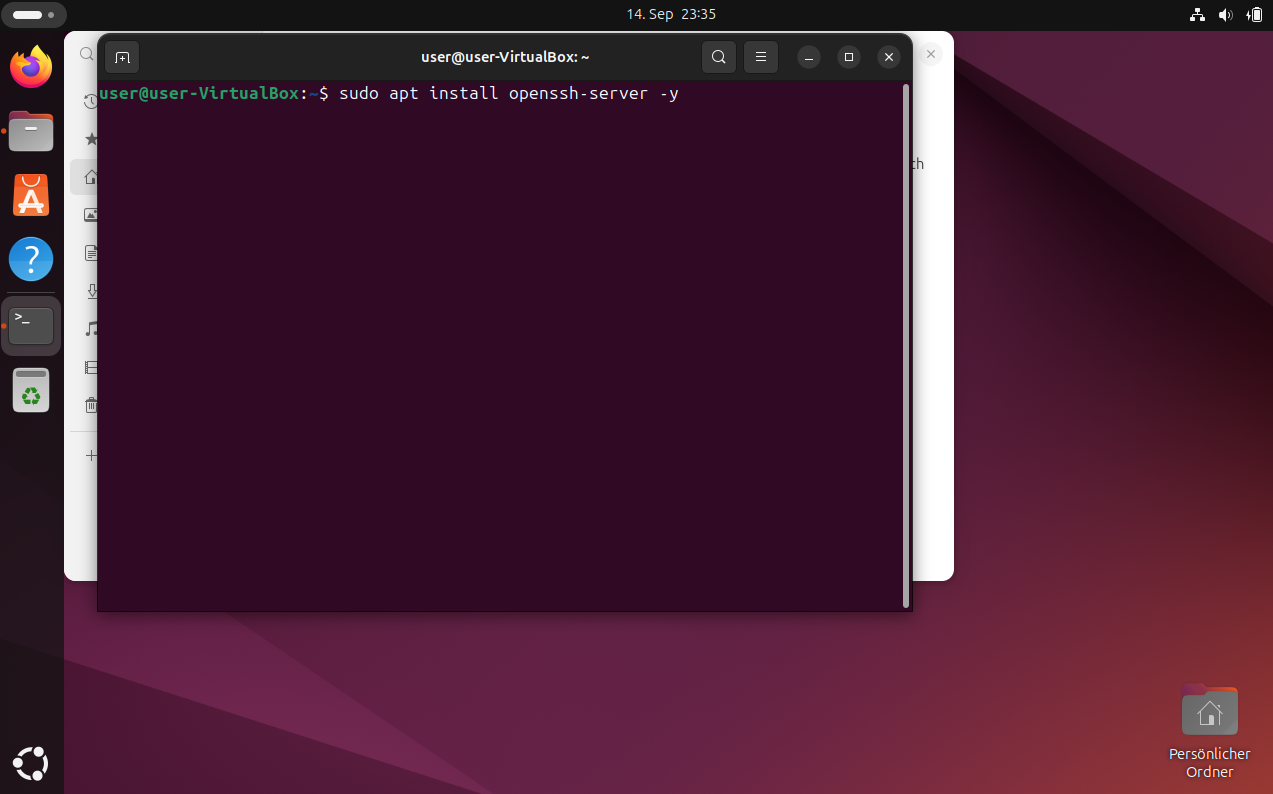
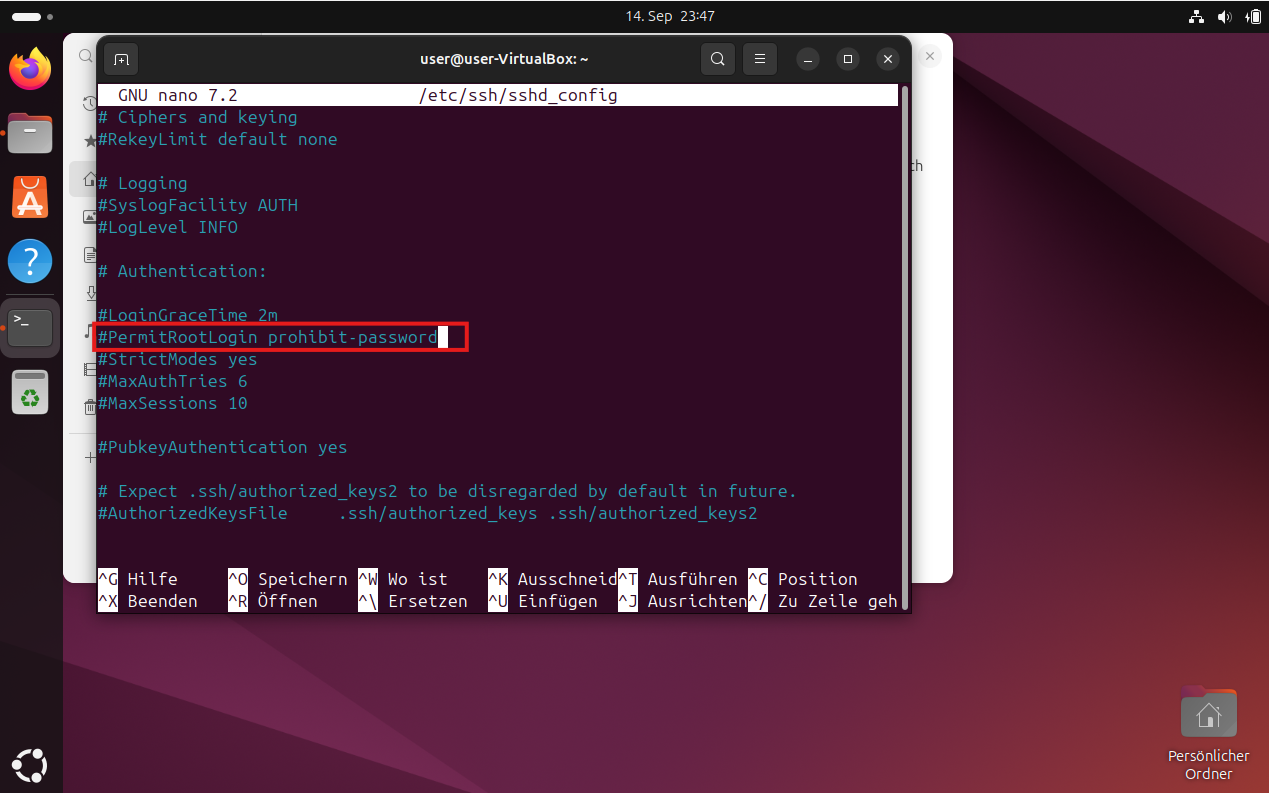
4. Allow 'root' login
I always enable root login, so if I have a separate root user, I can also log in via SSH. For this, you need to open the following config file. Use this command:
sudo nano /etc/ssh/sshd_config
5. Search for this line
Search for this line; we will need to modify it.
6. Edit line
We delete the entry and replace it with this:
PermitRootLogin yes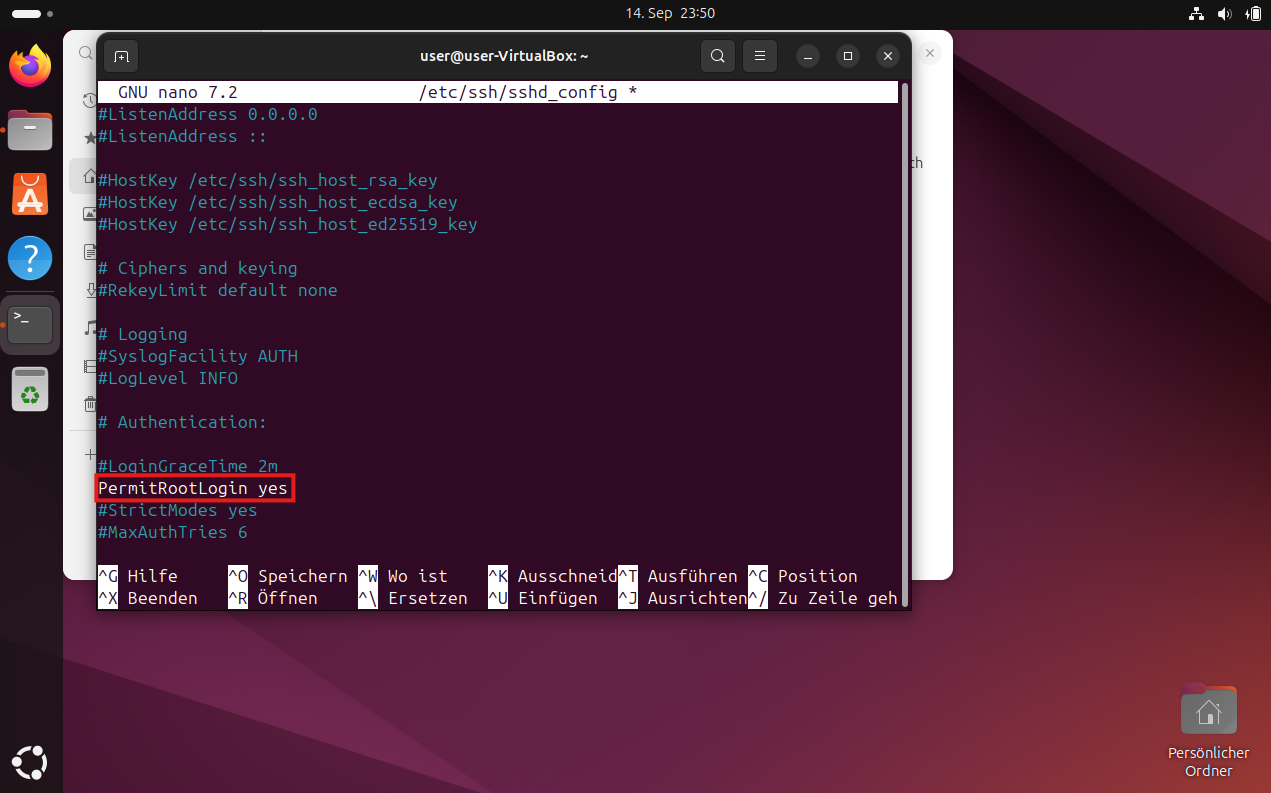
7. Save and Exit
Save the entry with Ctrl + O and Enter, and leave the editor with Ctrl + X.
8. Restart Service
Now, we restart the SSH service to ensure everything is loaded.
sudo systemctl restart ssh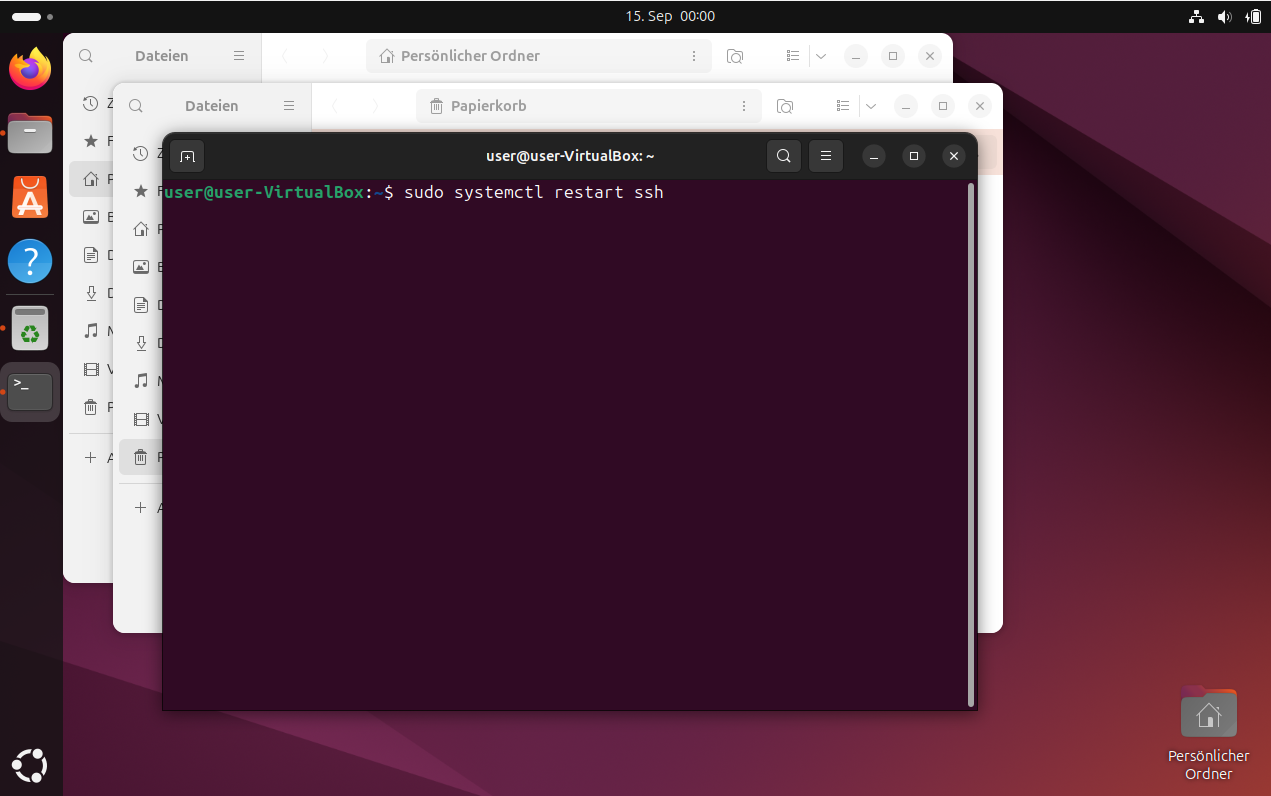
Now you can connect via SSH. I always use the software PuTTY.
9. Show IP Address
To connect to your machine, you need the IP address. This command will display the IP address.
ip a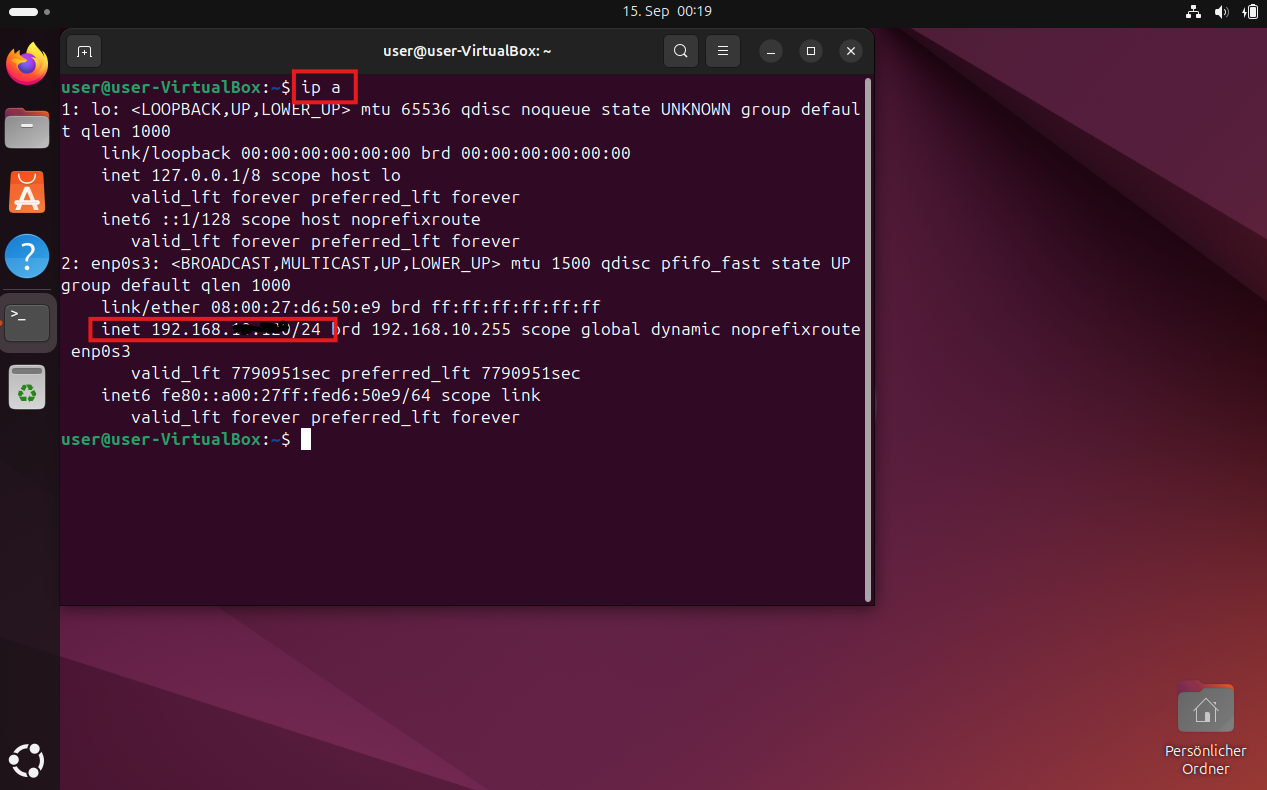
For Troubleshooting
Start SSH service
sudo systemctl start sshStop SSH service
sudo systemctl stopt sshRestart SSH service
sudo systemctl restart sshShow Status
sudo systemctl status ssh