Rustdesk

Get RustDesk Up and Running in 5 Minutes: Ubuntu Installation Guide
Installing a RustDesk Server on Ubuntu: A Step-by-Step Guide
In this article, I will guide you through the process of setting up a RustDesk server on an Ubuntu system. RustDesk is an excellent, free alternative to remote access tools like TeamViewer, and with this guide, you will have your own server up and running in just a few minutes.
I will explain each step in detail, making it easy to follow along, even if you have little experience with Linux. The installation process is simple, requires only a few commands, and allows you to have full control over your remote access server.
You will need sudo privileges to complete this installation. If you follow the guide on how to install Ubuntu, all necessary packages will be included. Here I show how you can install Ubuntu .
Let's Get Started
Copy and execute the commands in the terminal one by one, ensuring that you have root privileges:
sudo bashsudo apt update -ywget https://raw.githubusercontent.com/IT-4-ALL/rustdesk/main/install_rustdesk.shsudo chmod +x install_rustdesk.shsudo ./install_rustdesk.shChoose a Option
If you want to access your Server with IP Address press "1"
If you want to acces your Server with DNS press "2"

Write down your Public-Key
Note: The public key generated during the installation is crucial. When you install the RustDesk client software, you will need to enter both the server's IP address and this key. This ensures that the client can securely connect to your server.

Installing the RustDesk Desktop Client
Once your RustDesk server is up and running, you'll need to install the RustDesk desktop client to connect to it. The desktop client is available for various operating systems, including Windows, macOS, and Linux. Below are the general steps for installing the client software on your desktop system:
- Download the Client: Visit the RustDesk download page to get the appropriate version for your operating system.
-
Install the Client: Follow the installation instructions specific to your operating system:
- Windows: Run the downloaded executable file and follow the setup wizard.
- macOS: Open the downloaded DMG file and drag the RustDesk application to your Applications folder.
- Linux: For Debian-based systems, you can use the downloaded DEB file. For RPM-based systems, use the RPM file. Alternatively, you can use the package manager to install it directly from the repository.
- Configure the Client: After installation, launch the RustDesk client. You will be prompted to enter the server's IP address and the public key you obtained during the server installation. Enter these details to connect securely to your RustDesk server.
With the RustDesk client installed and configured, you can now enjoy remote access to your systems via your RustDesk server. Make sure to keep your server and client software up to date to benefit from the latest features and security improvements.
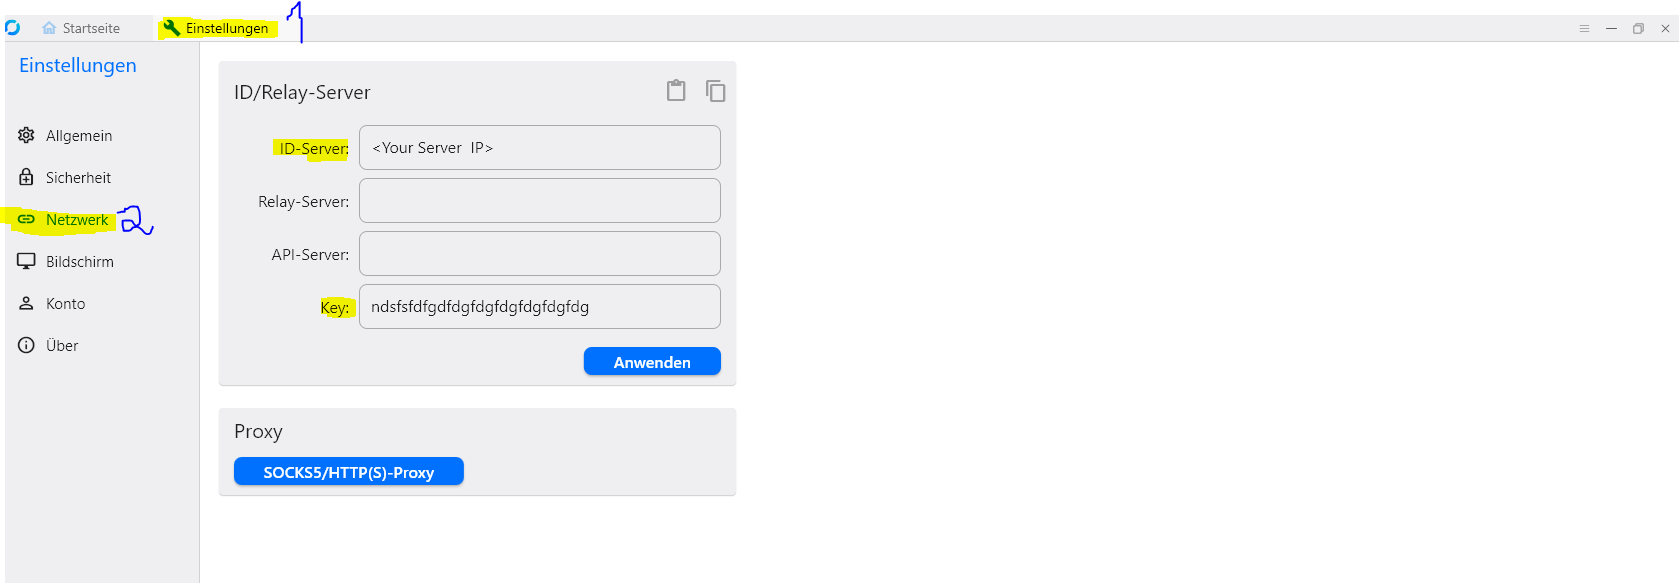
Client Software
Open your client Software and edit ID-Server and Key.