Nextcloud

Easiest Nextcloud Installation on Ubuntu 24.04: Step-by-Step Guide

Nextcloud is a powerful, open-source cloud platform that allows you to store and manage your files, calendars, and contacts securely. With this guide, even those new to server management can follow along and get Nextcloud installed with minimal effort.
We’ve streamlined the process to make it as simple as possible. You’ll be provided with clear instructions and essential commands to get everything configured quickly and efficiently. By the end of this guide, you’ll have a fully functional Nextcloud server ready to use, all on the latest Ubuntu 24.04 Live Server.
**Note**: On most Ubuntu installations, `sudo` is already pre-installed and configured by default. In this guide, we assume that `sudo` is available on your system. However, if you encounter a situation where `sudo` is not installed, you will need to install it using the package manager.
Let’s get started and bring your Nextcloud instance to life! Download Ubuntu 24.04 here Use Server Edition!
Install sudo or if you need help with installing Ubuntu Server Install Ubuntu
Let's Get Started
Copy and execute the commands one by one, ensuring that you have root privileges:
sudo bashsudo apt update -ysudo apt install wget -ywget https://raw.githubusercontent.com/IT-4-ALL/nextcloud/main/install_nextcloud.shsudo chmod +x install_nextcloud.shsudo ./install_nextcloud.shAfter Installation
Open your web browser and enter http://server, where server is the IP address or DNS name of the server where Nextcloud is installed.
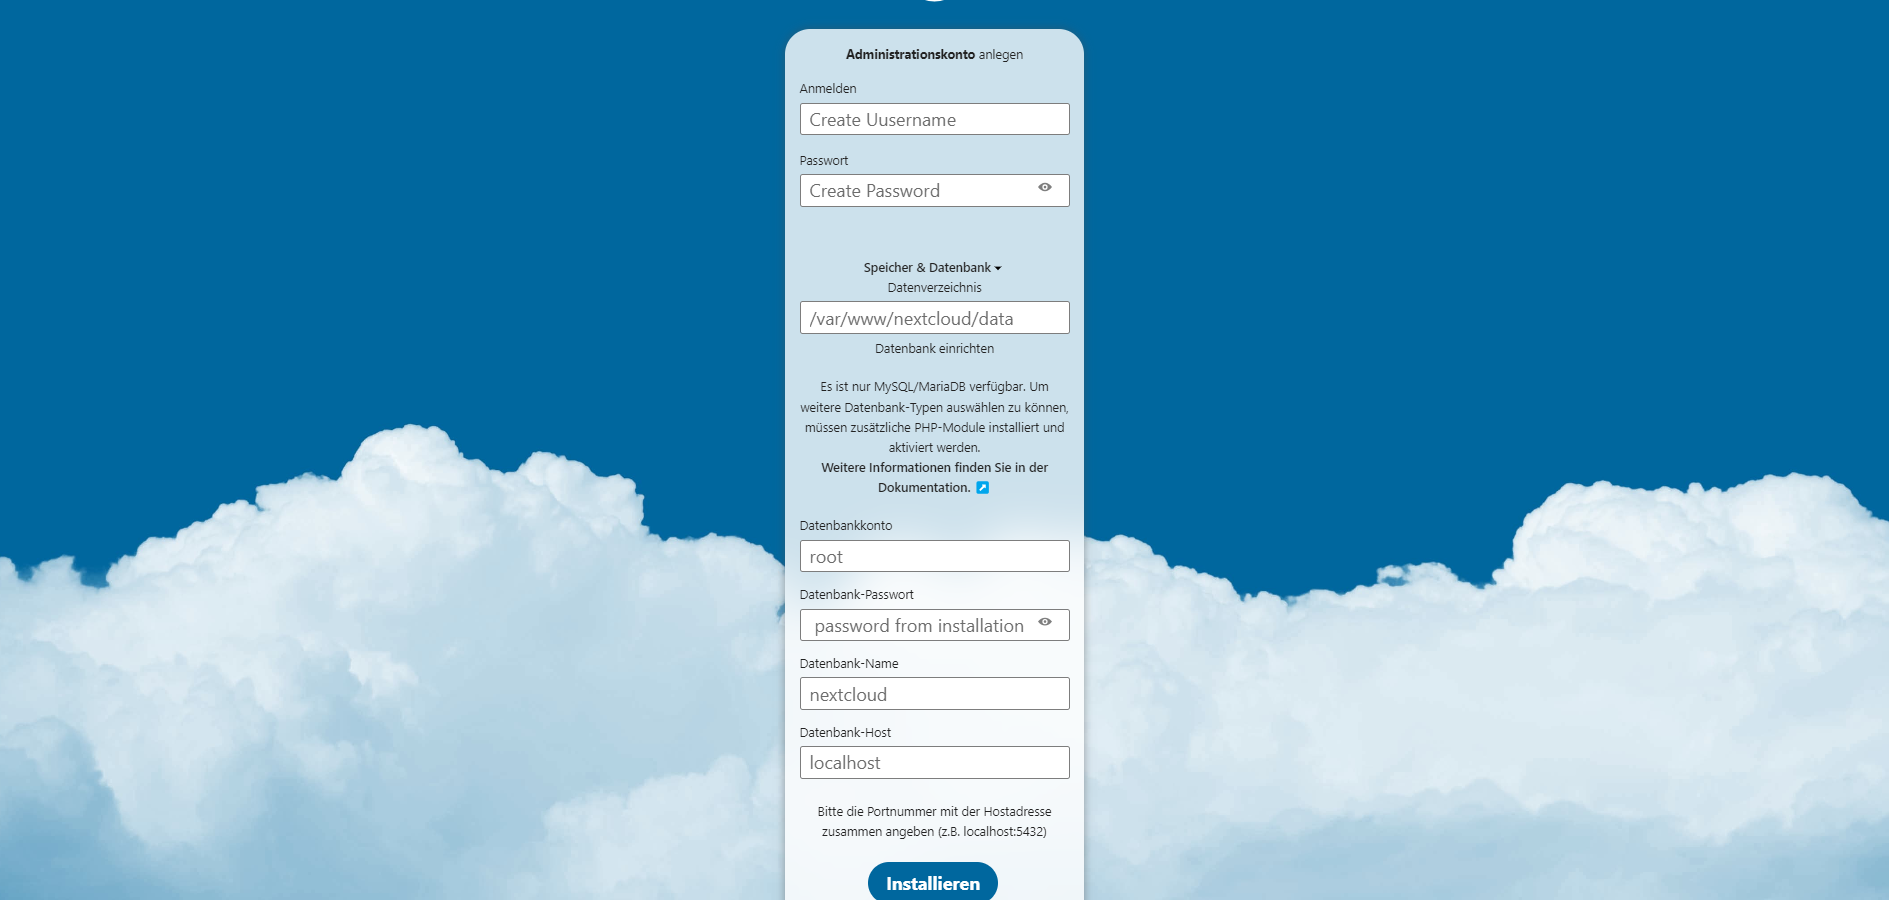
On the Nextcloud setup page, you will need to configure the following details:
- Username: Create a user name for your Nextcloud instance.
- Password: Choose a secure password for the user account.
- Database User:
root - Database Password: The password you set during the installation.
- Database Name:
nextcloud - Database Location:
localhost
Complete the setup process by following the on-screen instructions. Once finished, you will have a fully operational Nextcloud instance ready to use.
Important: Before proceeding with the installation, please ensure that no other web servers (like Nginx) or database services (such as MySQL or MariaDB) are currently installed on the server. These can interfere with the Nextcloud setup and cause issues. For the best experience, it’s recommended to use a clean server environment. This server can be either physical or virtualized. If you choose to virtualize, you can use popular platforms such as Hyper-V, Proxmox, Oracle VirtualBox, VMware, KVM, or even cloud-based solutions like AWS, Azure, or Google Cloud. Starting with a fresh installation will help avoid conflicts and ensure a smooth and successful setup of Nextcloud.