ITfourALL

Proxmox Setup
- Download current Proxmox version With this link you will find the current Proxmox version. Proxmox ISO
-
Create a bootable USB stick If you don't know how to do this click Here.
I always use the RUFUS software for this.

- Boot Stick or ISO So now the bootable USB stick is created in my example I have started the stick or the “ISO” in a virtual environment you will probably have a server in front of you. But the installation process remains the same. But make sure that you have connected all hard disks correctly so that they can be found at startup.
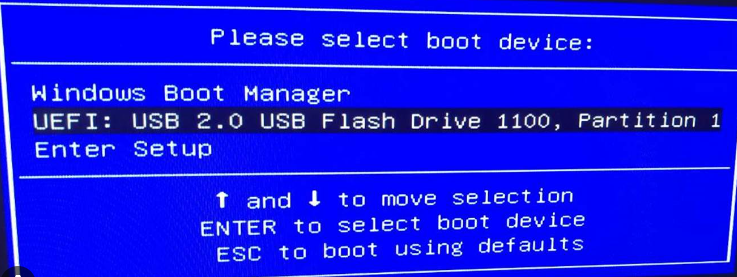
- Choose the right BOOT medium If the boot medium is not started automatically, the BOOT sequence must be changed or some BIOS versions display the image for starting after pressing the correct “F” key. This is unfortunately very brand dependent. Otherwise just google it. “Brand” start from USB INFO The most common keys are “F1”, “F2”, “F5” or “F8”. Simply press these keys several times in quick succession immediately after starting the server. The message Press “F..” to enter Setup often appears at the bottom of the screen.
-
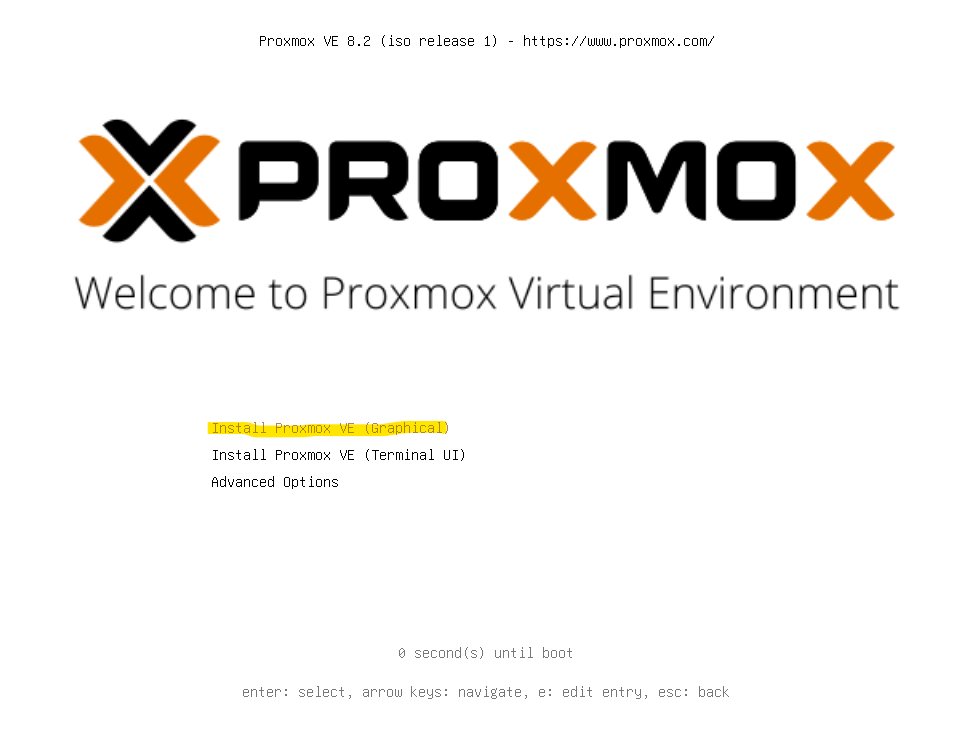
Proxmox image successfully loaded Now this desktop view appears Click on Intstall Proxmox VE (Graphical)
-
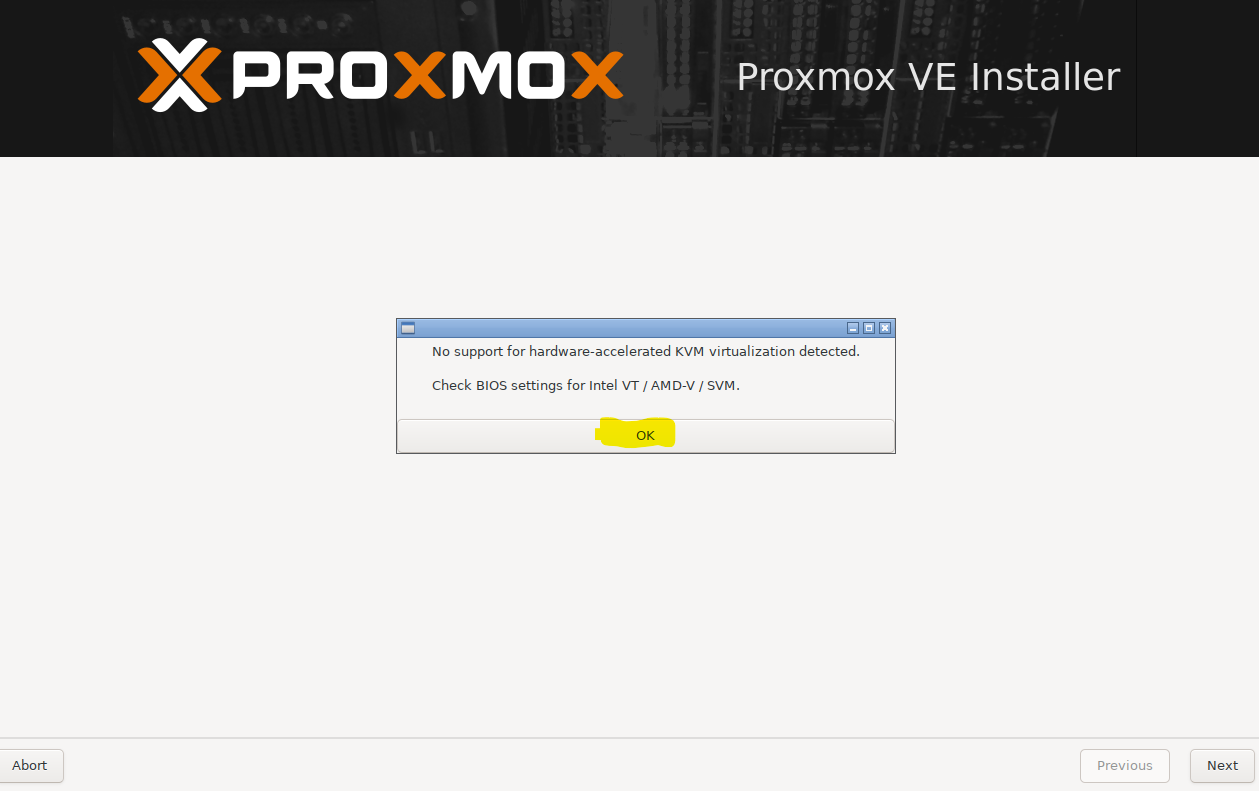
Sometimes an error message appears If this message appears, it means that the hardware has not been tested by Proxmox and there is no guarantee that everything will work. I have now installed it on several hardware models and have seen this message several times, but I have never been able to detect a malfunction. At the end of the tutorial I will introduce suitable hardware. Click OK
-
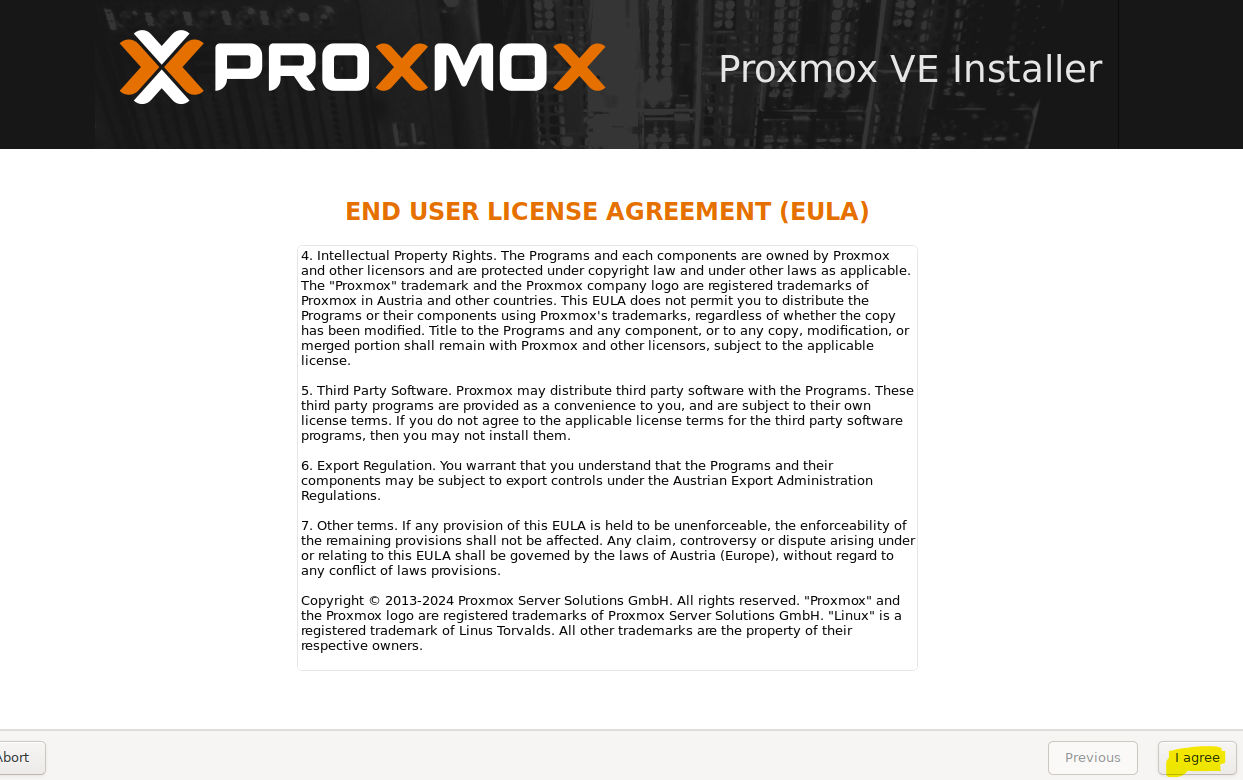
Agree to the Proxmox license terms To continue you must confirm the license agreement.
-
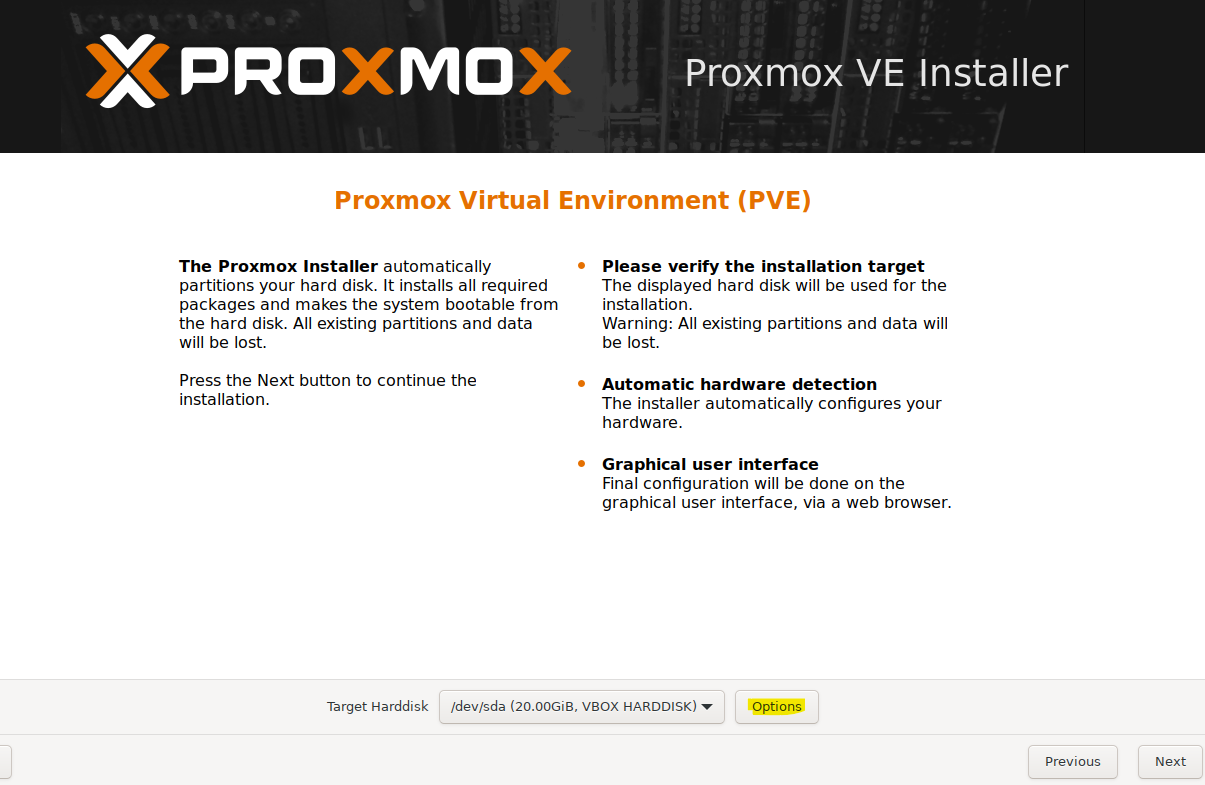
Select hard disk Here we are at an important step in the Proxmox installation. If you now click on “Options”, you can select the file system. In this example, I am only using one hard disk. I recommend the ZFS file system.
-
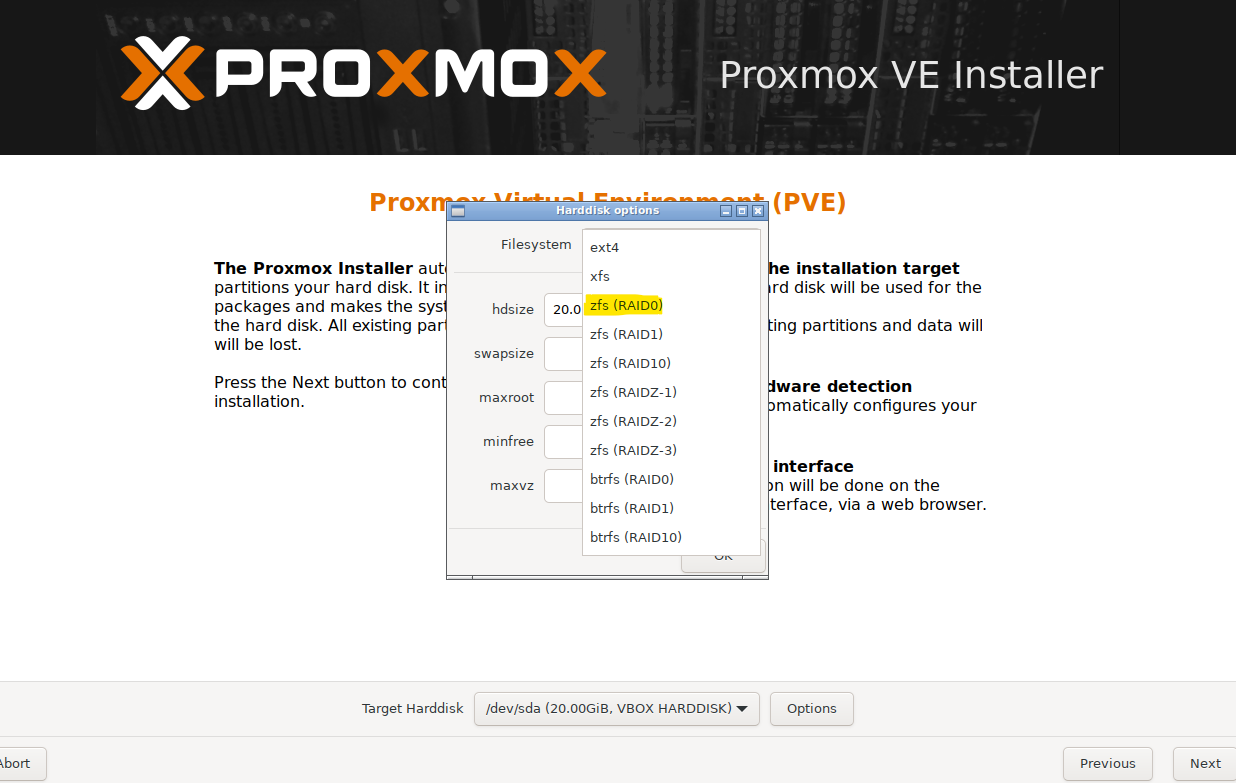
Select file system As I mentioned earlier, we are now selecting the file system. I recommend the ZFS file system if you want to work with a raid system. This means that you create a storage system from several hard disks and if one or more disks fail, you will not lose any data. If you want to continue with a RAID system click
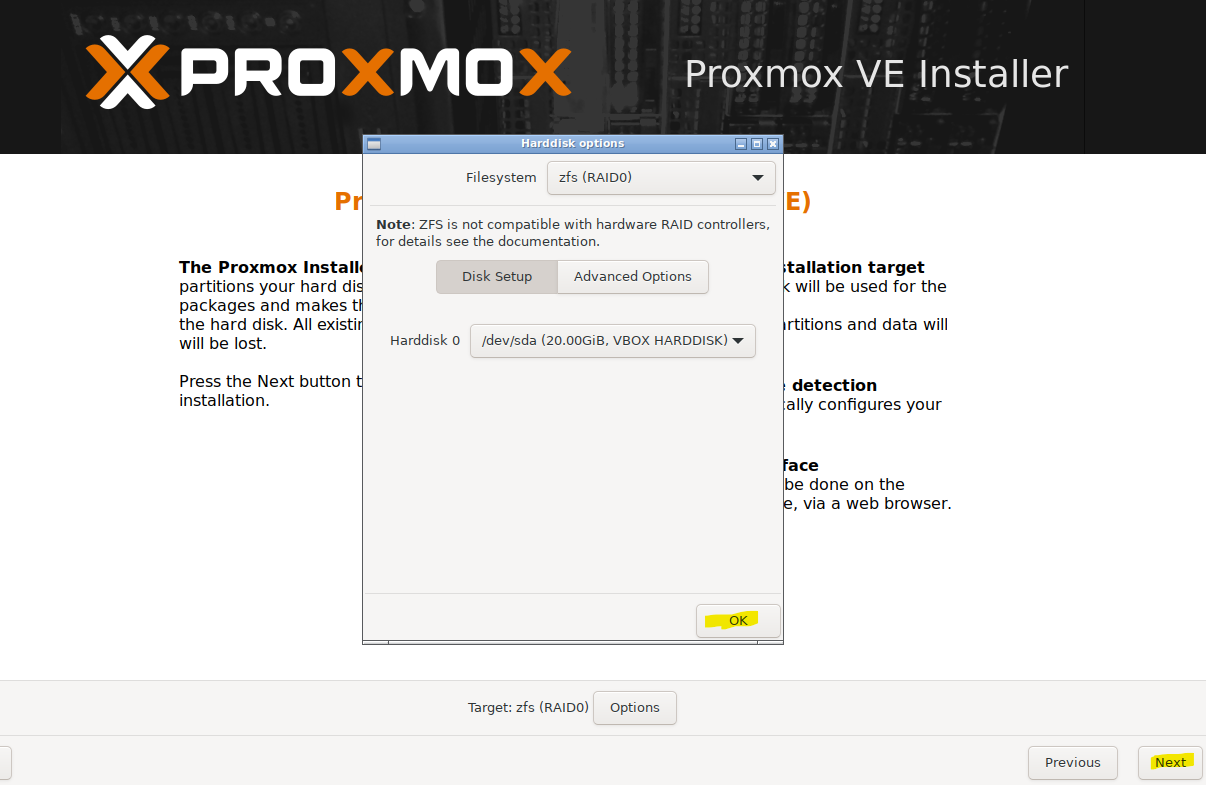
Here. Otherwise, choose your File Sytem(ZFS RAID0).
-
When this message appears Confirm with “OK” and then click on next. If you have selected ext4, this message does not appear and you click on Next.
-
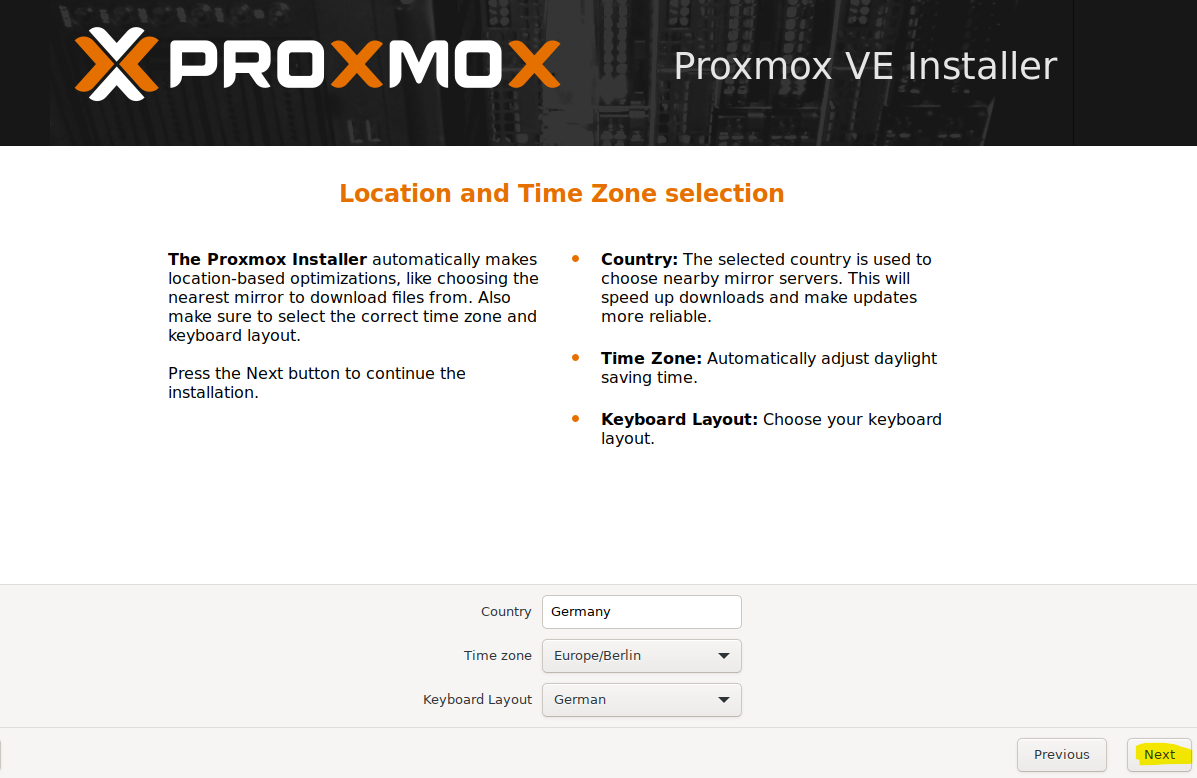
Location and Timezone Now select your country and the corresponding time zone and click on next.
-
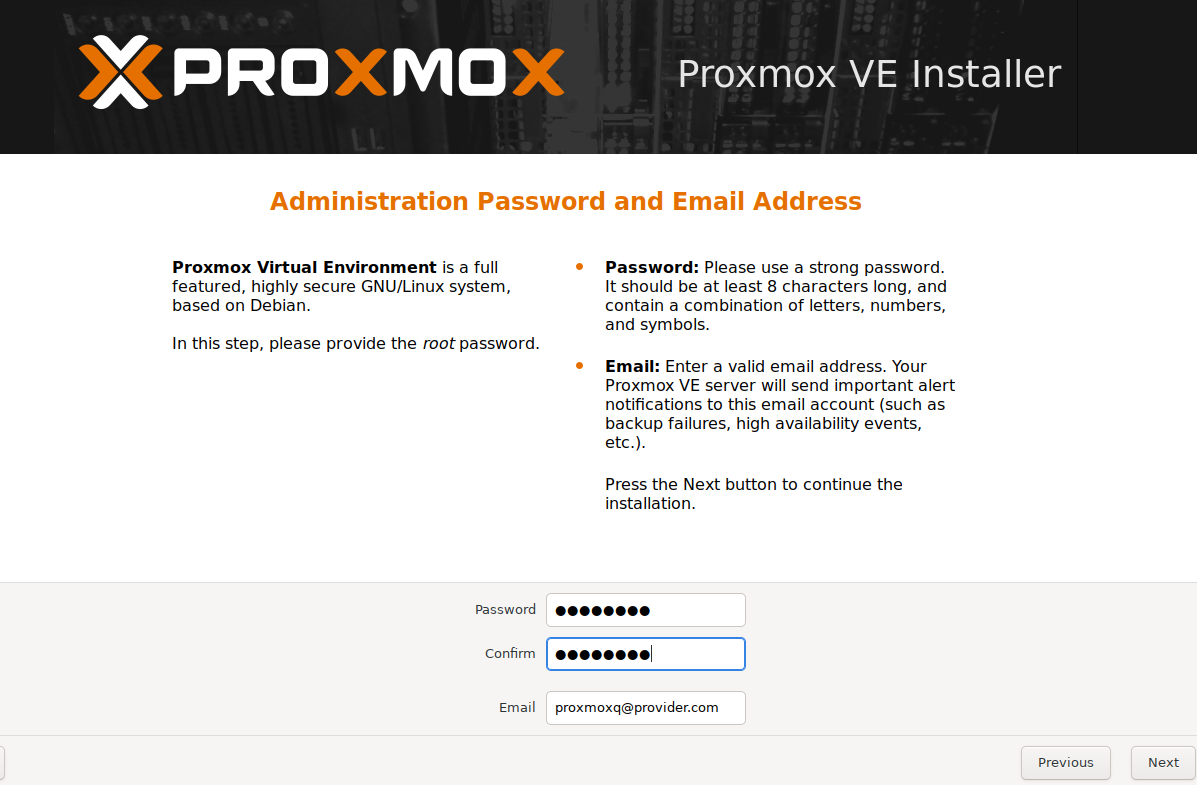
Enter a secure password Enter a secure password and a valid e-mail address and click on Next
-
Network Configuration I hope you have already considered in which network the Proxmox server should run and whether it should get a static IP address or whether it should get one from a DHCP server. I recommend assigning a static IP address to make it easier to reach the server in the event of an error.
Several settings have to be made here, but I will now explain each point.
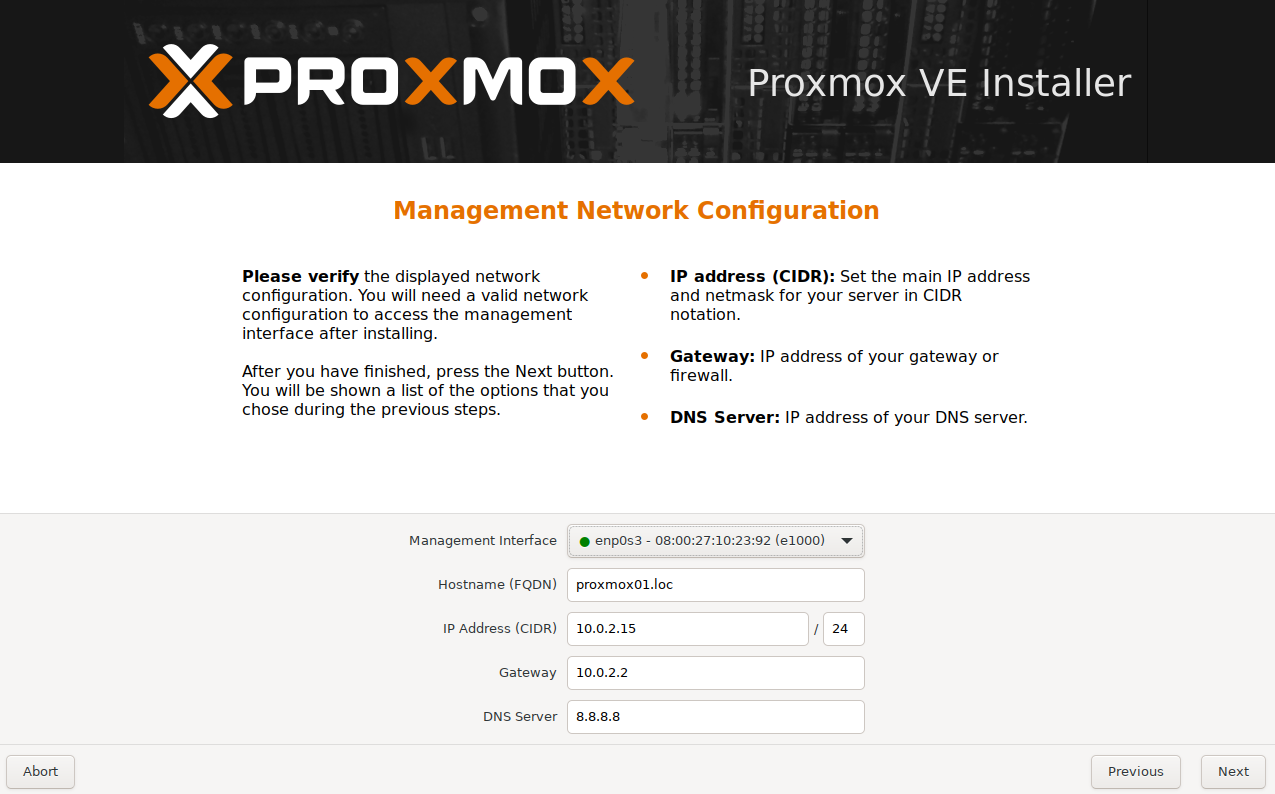
Select a Management Interface
In most cases, a server has several network cards. For example, one network card is for the management of the server and another for the data traffic of the individual virtual machines. In order for your server to be able to connect to the network, you must select the network card on which the network is available for your specified IP address. The network connection must contain an Untagged Vlan for server management.
But of course you can also use only one network card, you just have to make sure that the management network is untagged on the network card and the other networks that run over the network cable must be tagged.
If you don't have any vlans in your network, then the virtual machines running on the Proxmox server are in the same network as the server itself.
Hostname
Assign a unique hostname. This name may only be assigned once in your network yourserver.loc the .loc means that the server is located in a local network.
IP Address / Gatetway
Your Proxmox server should now have the correct network cable connected and the correct network card selected. If you are not sure which IP addresses are still available for this network, look in your router. Also look for the gateway.
Do not enter this IP address as in this example. The IP address of your server depends on your network!!!
DNS Server
You can use your own DNS server or if you don't know which one to enter then use the one from Google. With the IP 8.8.8.8
If you finished click Next
-
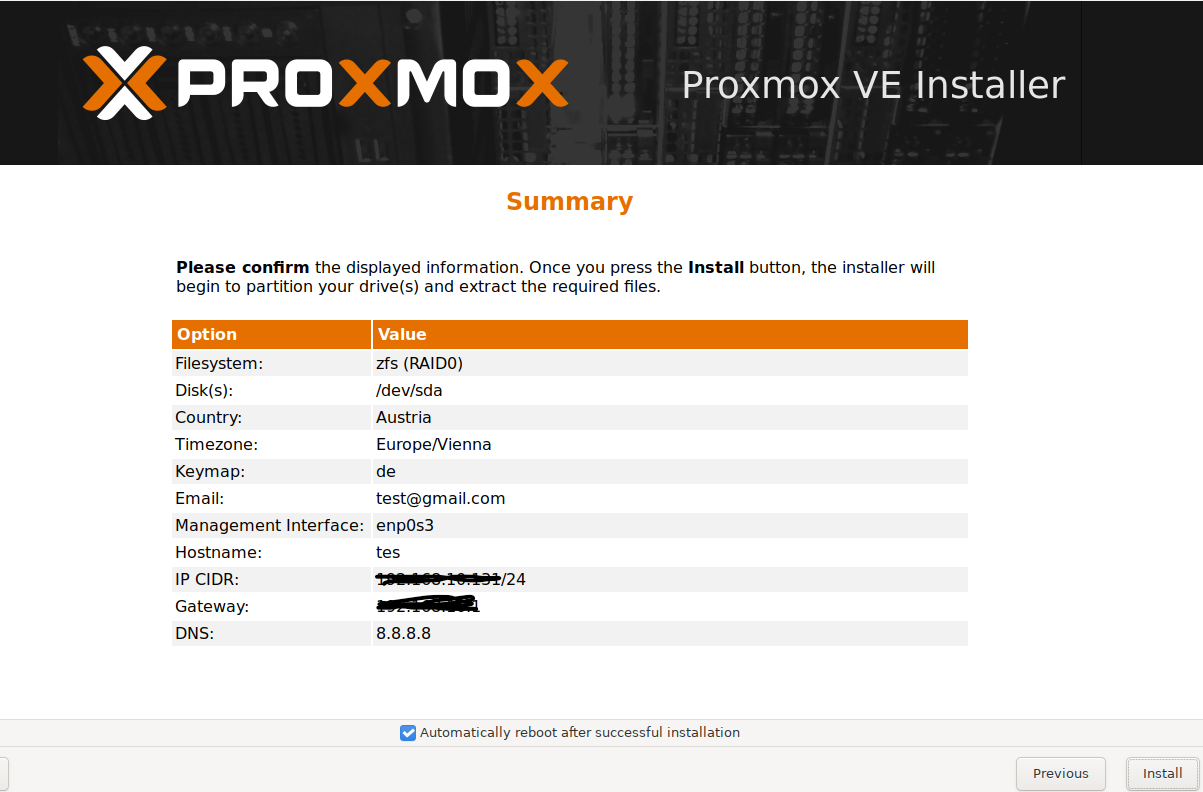
Summary Now rinse over everything you have entered. If everything is OK, click on Install and the installation process will begin.
After the installation process the server will restart. If it jumps back to the start of the installation process after the restart, you must remove the USB stick with the BOOT image. Otherwise the server will always start from the USB stick. A tip: check the BOOT sequence in the BIOS. Make sure that the hard disk where the operating system is installed is the first BOOT option.
-
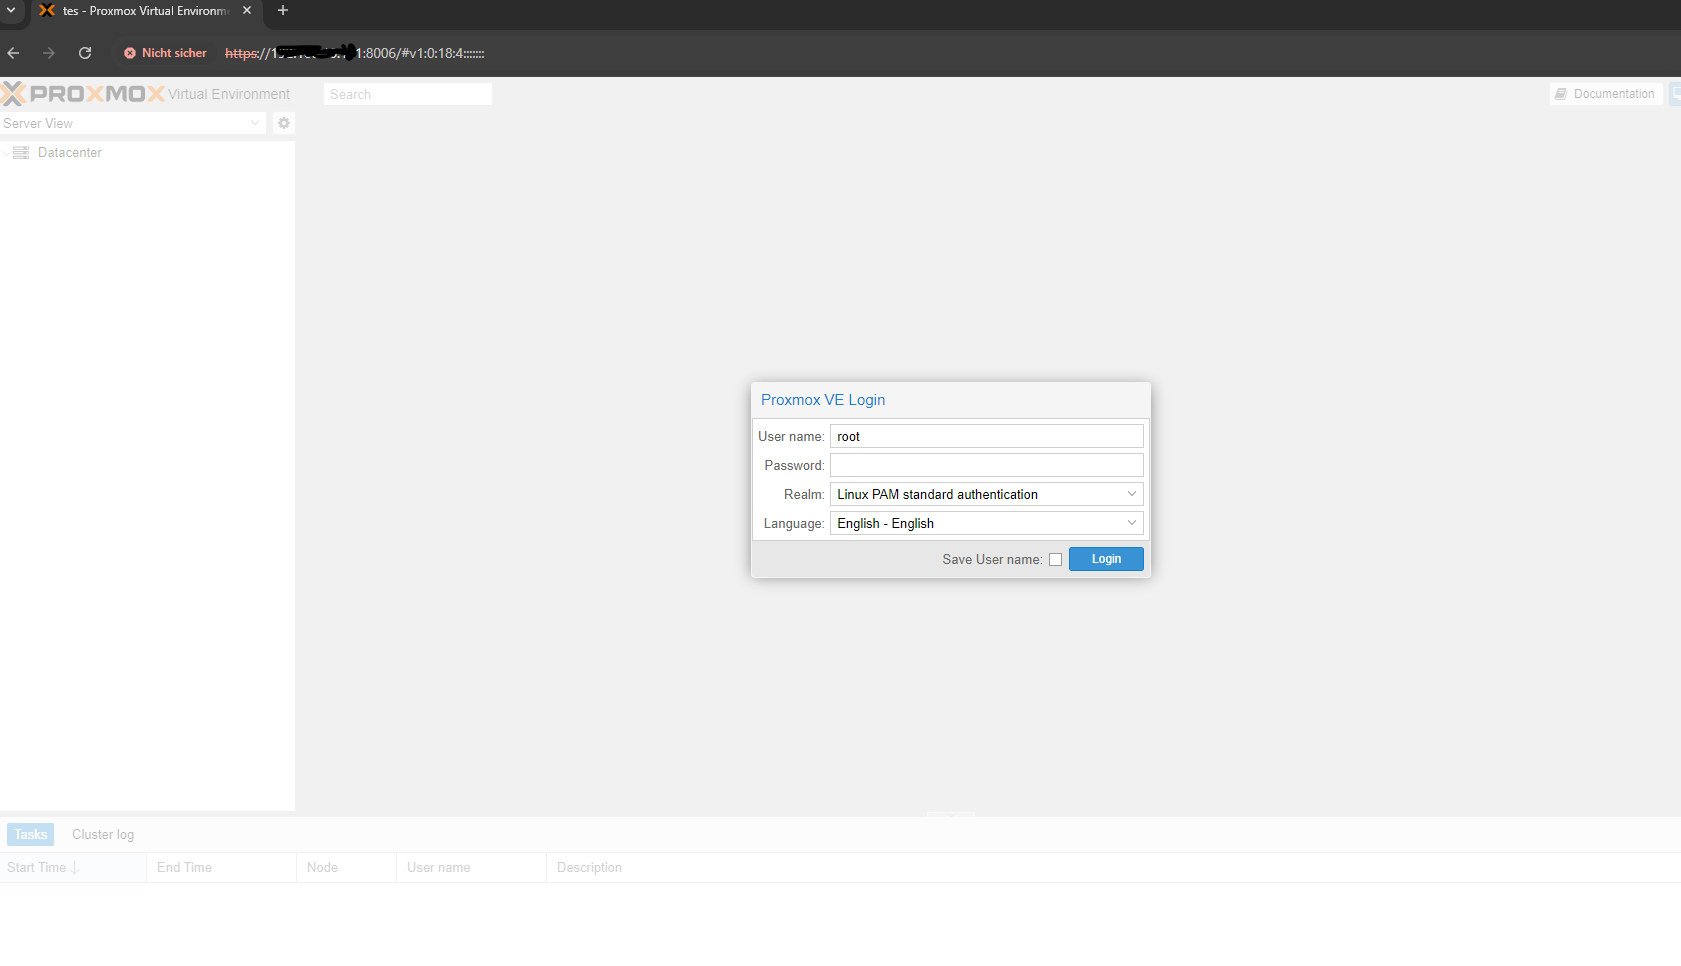
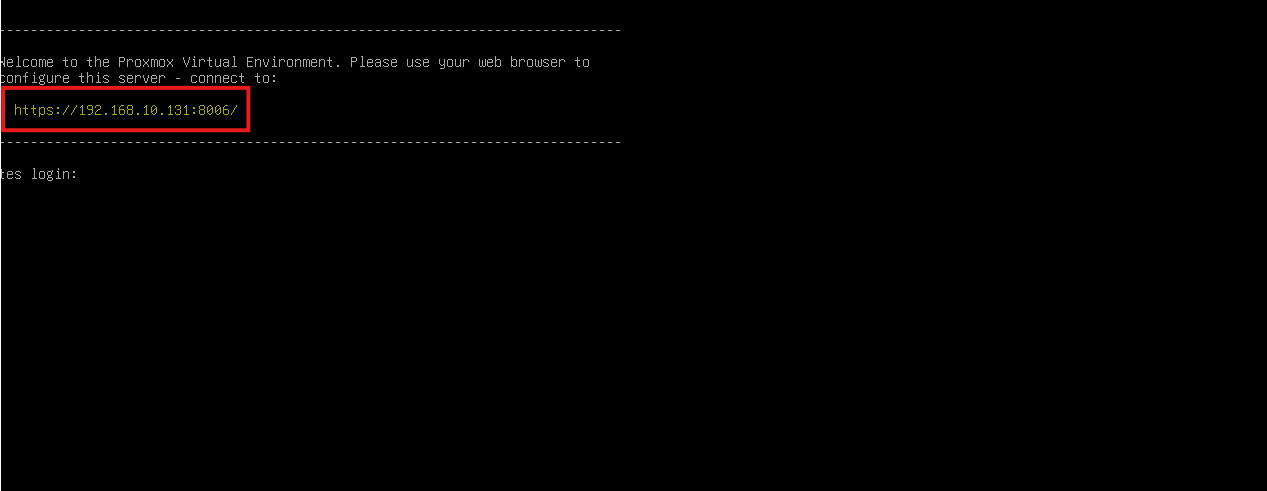
Final Check If everything has worked, you will be shown the IP address or the link which you can then enter in your browser.
It looks like this https://xxx.xxx.xxx.xxx:8006
-
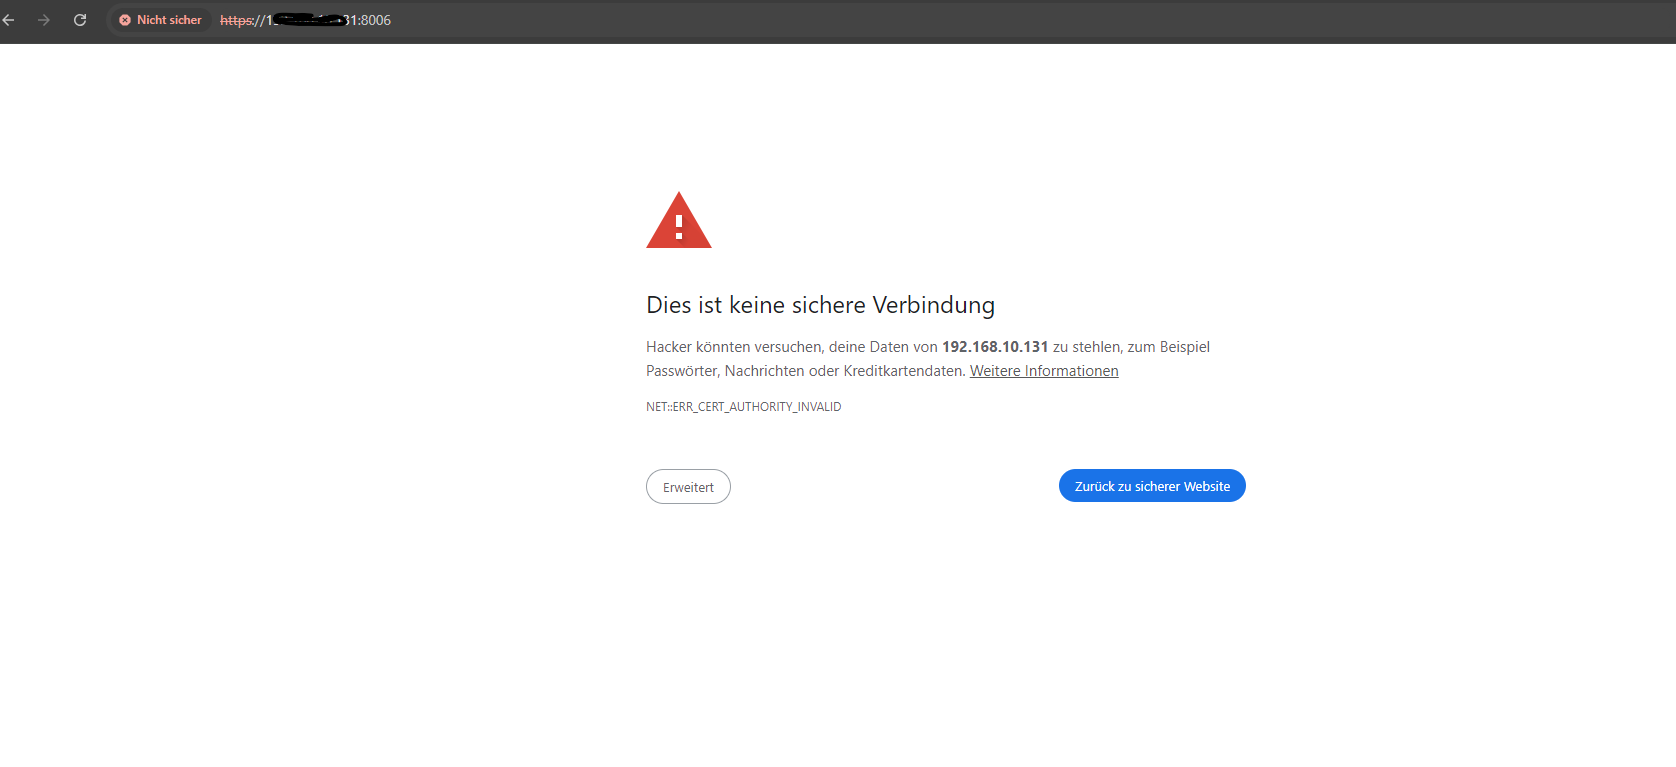
Open your Browser Now enter the link in your browser and you will get the message that the connection is not secure, but since you have just installed the server yourself, you know that the browser's concerns are not justified. Confirm to the browser that the connection is secure.
-
Login Now the login window finally appears. The user is root and the password is the one you entered during the installation process.