ITfourALL

Handling a Failed Hard Disk in Software RAID
It can happen that a hard disk becomes damaged and stops functioning. The defective hard disk must be removed and replaced. The best way to identify the faulty disk is by using its serial number, which will help you in the replacement process.
Here are two methods to identify the defective hard disk:
- If you already know the serial number of the defective hard disk, you can directly replace it.
- If you do not have the serial number, you can use a process of elimination:
- Note down the serial numbers of the hard disks that are online.
- Locate these disks in the server.
- The defective disk will be the one not matching the serial numbers you have noted.
The new hard disk should now be installed and the old one removed. It is important to ensure that the new hard disk has the same storage capacity as the one being replaced, especially when using a RAID system.
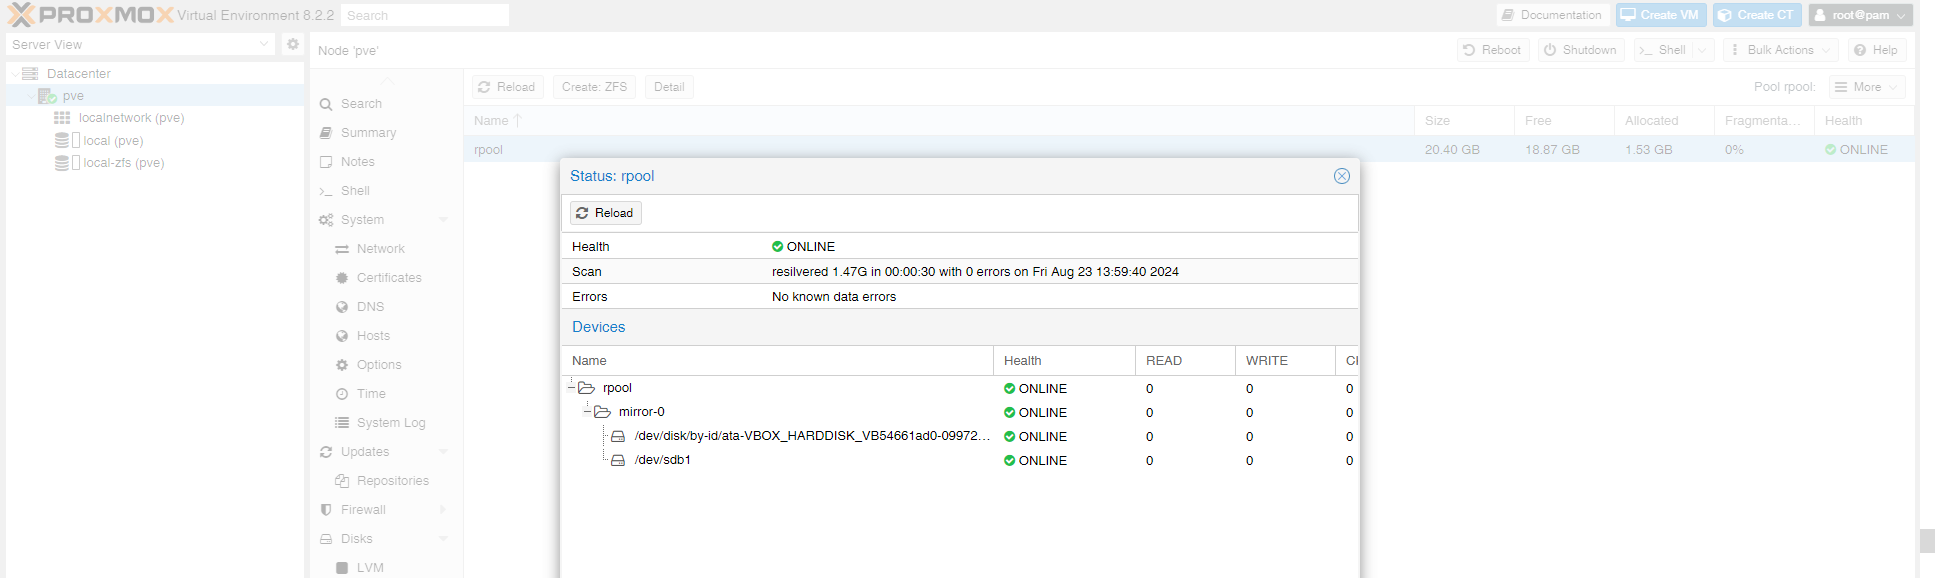
We open the overview again where the hard disks and the health status are displayed.We make a note of the number of the unavailable hard disk. We also make a note of the POOL name in this example the POOL is called “rpool” this name may be different for you.

Tip: Here's a quick way to copy the serial number of your hard disk:
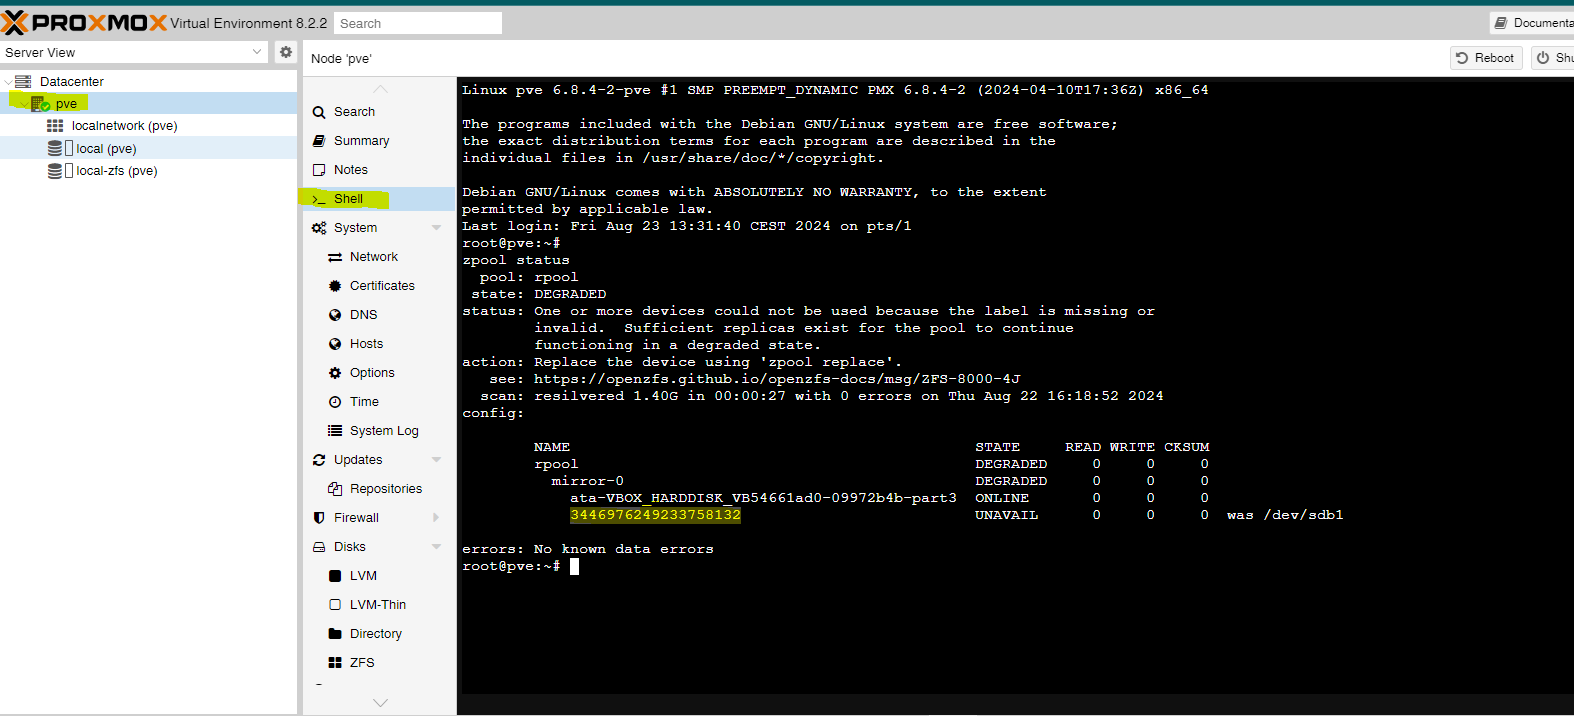
- Open the terminal and enter the command:
zpool status - A list of your pools and disks will appear.
- Simply find the serial number, highlight it, and copy it.
- You can then paste it into a text file, avoiding the need to write it down manually.
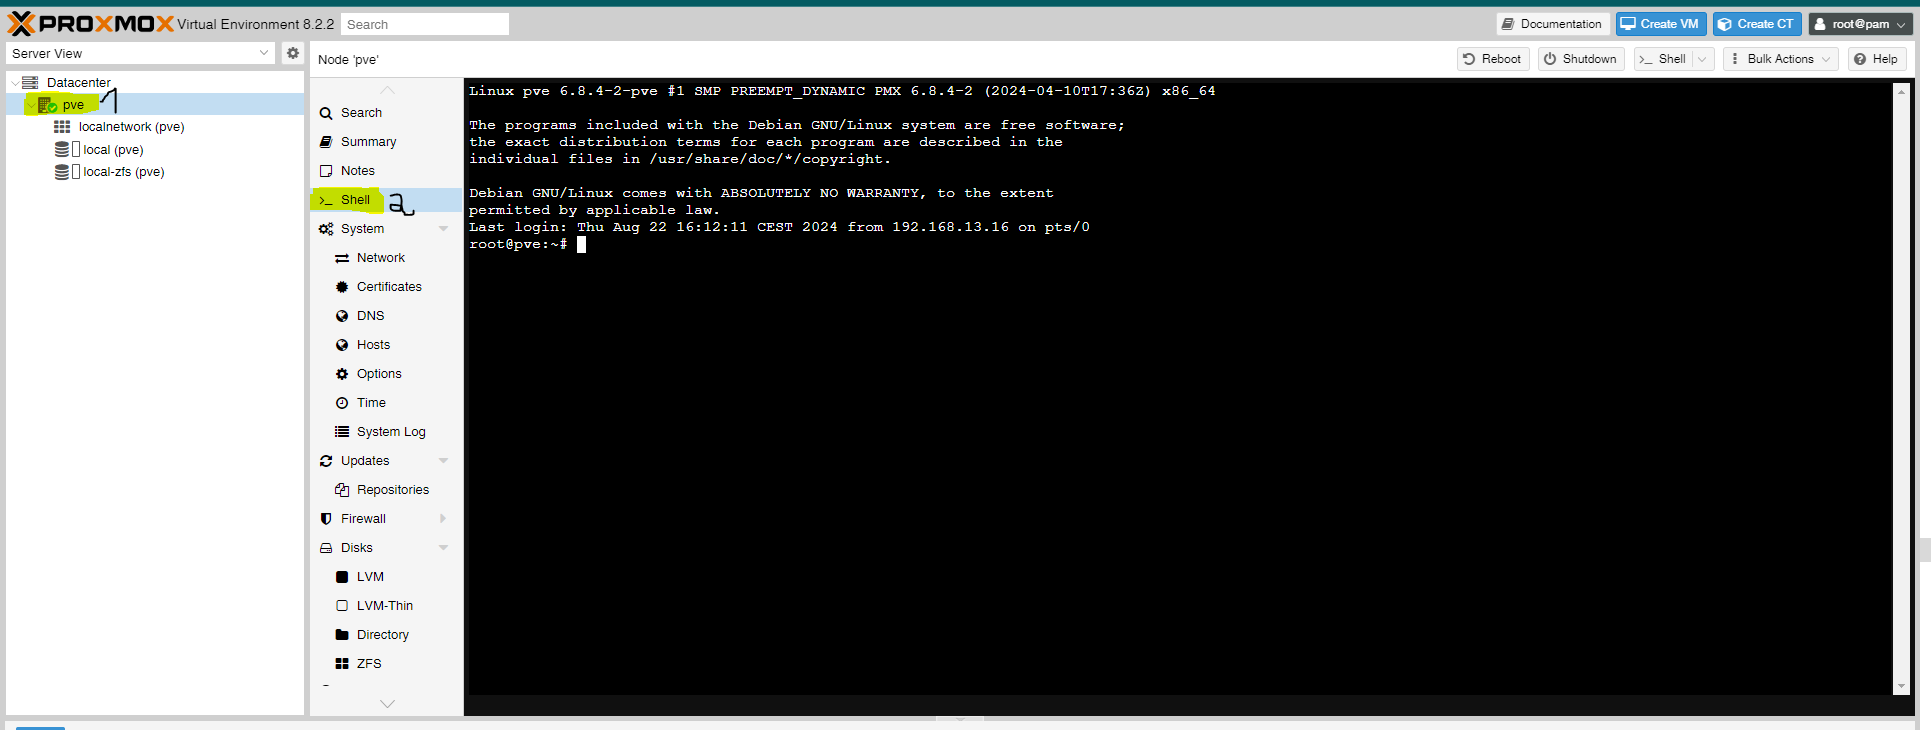
Accessing the Server Console
To begin, we need to access the server's console. You have two options: you can either use the integrated web console or connect to the server via SSH using an external tool. For this example, we'll be using the web console.
Using the web console provides a straightforward way to interact with the server, especially when you need quick access without the need for additional software. If you prefer using SSH, ensure you have the necessary credentials and tools, such as PuTTY or a terminal application, to establish a secure connection.
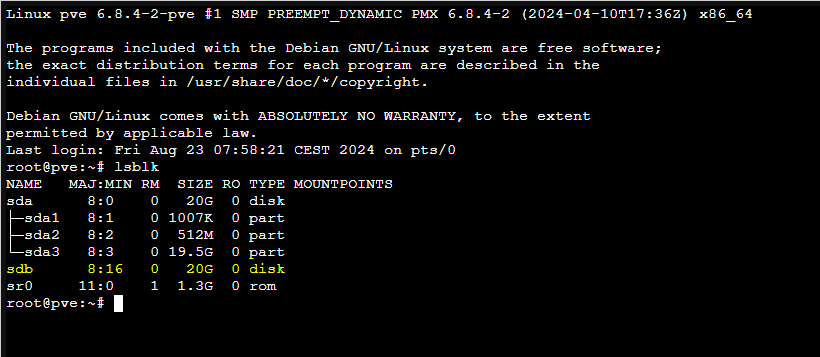
Listing Hard Disks Using the Terminal
To view all connected hard disks, enter the following command in the terminal:
lsblk
This command will display a list of all the hard disks currently connected to the server. It's a good idea to run this command before swapping any hard disks. By doing so, you can easily identify the newly added disk once the replacement is complete.
lsblkIn this example, you can see that the hard disk labeled sdb is new. An indication of this is that the hard disk does not yet contain any partitions.
Edit Command
We have previously noted the pool name and the serial number of the hard disk. We now have to compile our shell command from these two variables.zpool offline <POOLname> <serialnumber>
With this command we set the hard disk offline. Otherwise it cannot be removed.
Important: Do not copy this code verbatim. Instead, make sure to replace <POOLname> with your actual pool name and <serialnumber> with the serial number of your hard disk.
zpool offline rpool 3446976249233758132After entering the command, the hard disk is properly offline.

Now, let's mount the new hard disk. To do this, you'll need the pool name, the serial number of the defective hard disk, and the name of the new hard disk.
The command is structured as follows:
zpool replace <POOLname> <old_serialnumber> <new_diskname>
zpool replace rpool 3446976249233758132 sdb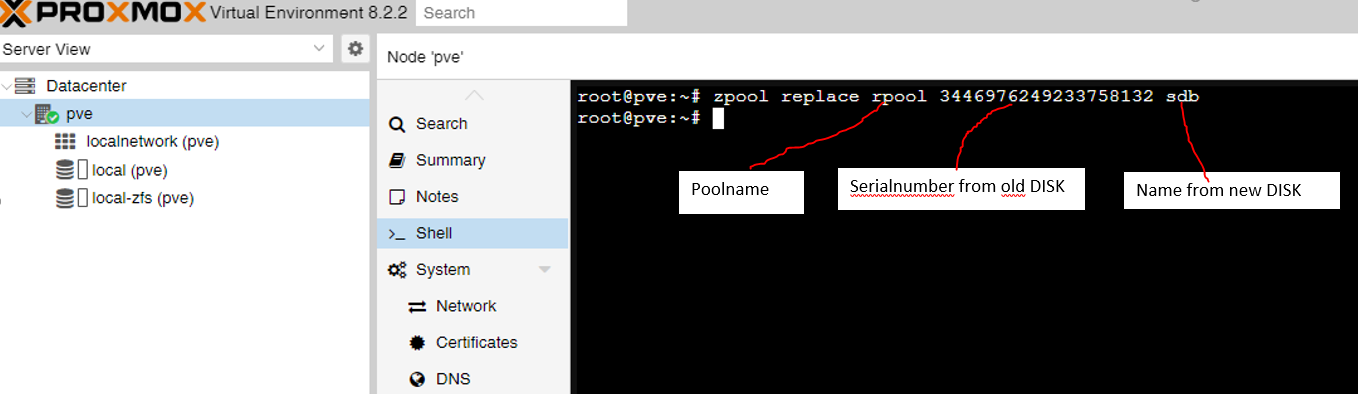
Once the command is executed, the data will begin redistributing across the pool, which may take some time depending on the size of the data and the speed of the disks.