Nginx RTMP Server Setup

How to Install Nginx and Set Up an RTMP Server on Debian/Ubuntu
This guide will help you set up Nginx with RTMP support on Debian/Ubuntu. We'll cover the steps to install Nginx, configure the RTMP module, and stream live video from OBS Studio.
Step 1: Install Nginx and Required Components
Open a terminal either via SSH or directly on the server. To install Nginx along with the necessary components, enter the following commands one by one. Root privileges are required.
su #for root privileges you need your root passwordapt update -yapt install sudo wget -ywget https://raw.githubusercontent.com/IT-4-ALL/nginx_rtmp/main/install_nginx.sh -O install_nginx.shsudo chmod +x install_nginx.shsudo ./install_nginx.shStep 3: Configure Nginx for RTMP Streaming
With Nginx installed, the next step is to configure it to support RTMP streaming:
1. Open the Nginx Configuration File
Start by opening the Nginx configuration file using a text editor:
sudo nano /usr/local/nginx/conf/nginx.conf2. Add RTMP Configuration
Insert the following RTMP configuration into the file:
# RTMP Configuration
rtmp {
    server {
        listen 1935; # RTMP port
        chunk_size 4096;

        application live {
            live on;
            record off;
        }
    }
}
3. Save and Exit the Editor
Save your changes and exit the text editor. For nano, press CTRL + X, then Y to confirm, and Enter to save and exit.
4. Test the Nginx Configuration
Check if the configuration is correct:
sudo /usr/local/nginx/sbin/nginx -t -c /usr/local/nginx/conf/nginx.conf5. Restart Nginx
Apply the new configuration by restarting Nginx:
sudo /usr/local/nginx/sbin/nginx -s reloadThis guide explains how to set up an RTMP server and use it for streaming with OBS Studio. We will cover how to configure your RTMP server and incorporate a stream key to secure your stream.
RTMP Server Configuration
Below is the basic configuration for your RTMP server using Nginx:
# RTMP Configuration
rtmp {
    server {
        listen 1935; # RTMP port
        chunk_size 4096;

        application live {
            live on;
            record off;
        }
    }
}
Stream Link and Stream Key
Your RTMP stream link will look like this:
rtmp://server/live/stream_keyHere's what each part means:
- rtmp:// - The RTMP streaming protocol.
- server - The IP address or domain of your RTMP server.
- live - The application name defined in your Nginx configuration.
- stream_key - The unique stream key or password phrase you will use to authenticate your stream.

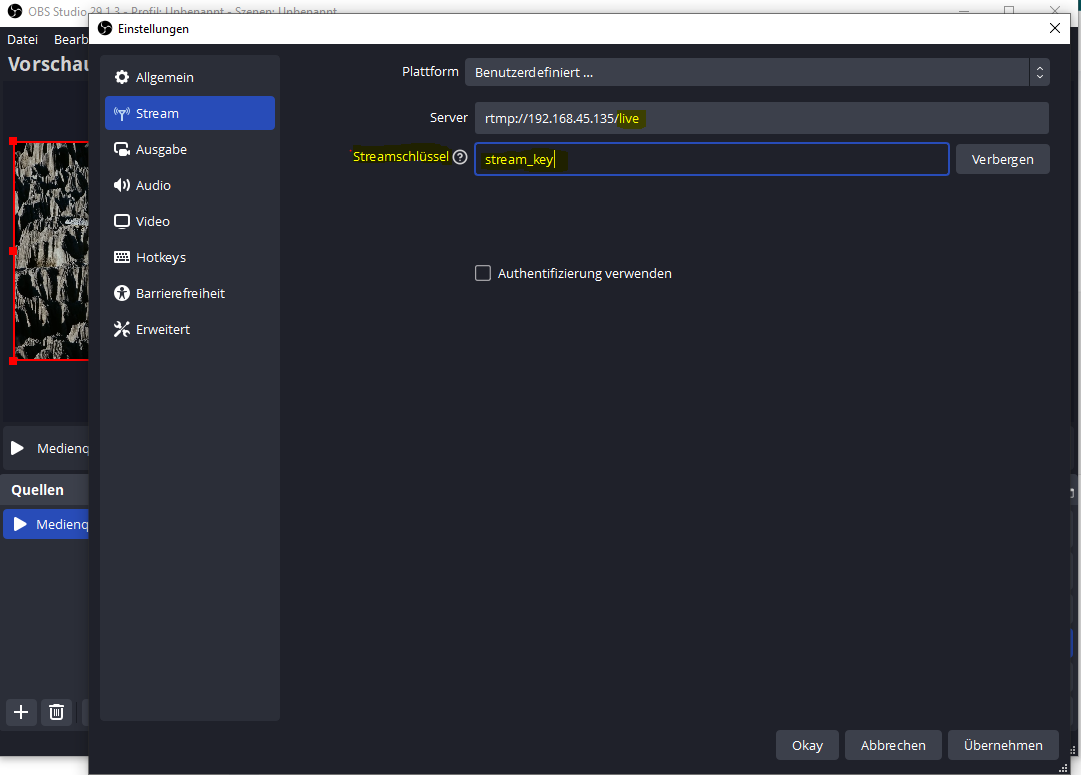
Adding a Stream Key in OBS Studio
To securely stream using OBS Studio, follow these steps:
- Open OBS Studio and go to Settings Stream.
- Select RTMP Server as the service.
- Enter your RTMP server URL (e.g.,
rtmp://server/live) in the Server field. - In the Stream Key field, enter your stream key (e.g.,
my_secure_key). - Click OK to save your settings and start streaming.
Opening a Stream in VLC Player
To view the stream in VLC Player, follow these steps:
1. Open VLC Player:
Launch VLC Media Player on your computer.
2. Open Network Stream:
Go to “Media” in the top menu and select Open Network Stream or use the shortcut Ctrl+N.
3. Enter Stream URL:
In the “Network” tab, enter the URL of your stream. This URL is typically provided by your streaming platform or can be in the format of an RTMP or HTTP stream URL (e.g., rtmp://your-server/live/stream).
4. Play the Stream:
Click the “Play” button to start viewing the stream in VLC Player.
5. Adjust Buffering (Optional):
If you notice a delay or buffering, you can adjust the caching settings to optimize the playback. Go to “Tools” > “Preferences” > “Input/Codecs” and increase the value of “Network caching (ms)” as needed.
By using the stream key, you ensure that only users who know the correct key can access your live stream.
My final RTMP stream link will look like this, Yours will look diffrent
rtmp://192.168.45.135/live/stream_key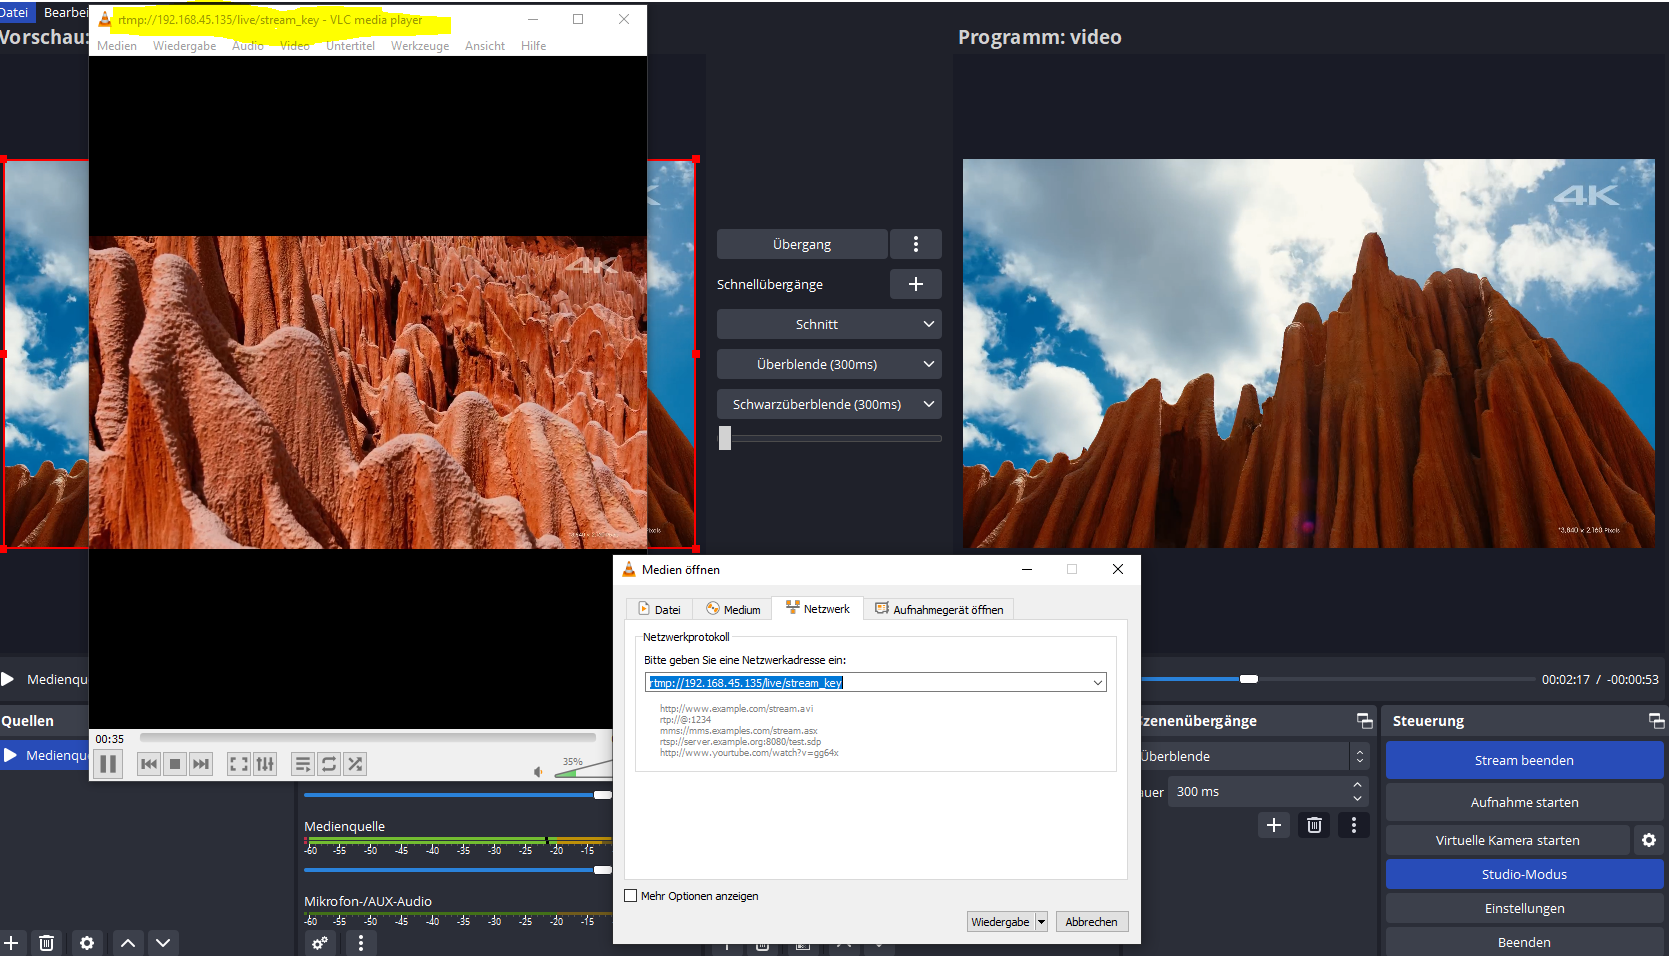
HLS Stream Configuration
To enable HLS streaming, add the following configuration to your Nginx setup:
# HLS Configuration
http {
    server {
        listen 8080; # HTTP port
        location /hls {
            types {
                application/vnd.apple.mpegurl m3u8;
                video/mp2t ts;
            }
            root /path/to/hls; # Path to HLS files
            add_header Cache-Control no-cache;
        }
    }
}

rtmp {
    server {
        listen 1935; # RTMP port
        chunk_size 4096;

        application live {
            live on;
            record off;

            # HLS settings
            hls on;
            hls_path /path/to/hls; # Directory for HLS fragments
            hls_fragment 5s;
            hls_playlist_length 60s;
        }
    }
}
RTMP Server Configuration second Stream
To set up your Nginx server to handle multiple RTMP streams, you need to configure your Nginx server with RTMP settings for each stream. Below is an example configuration to handle two RTMP streams:
# RTMP Configuration
rtmp {
    server {
        listen 1935; # RTMP port
        chunk_size 4096;

        # Configuration for the first RTMP stream
        application live {
            live on;
            record off;


        }

        # Configuration for the second RTMP stream
        application live2 {
            live on;
            record off;


        }
    }
}