Join Domain

Join a Windows Domain
How to Join a Windows Domain: A Step-by-Step Guide
Joining a Windows domain is a crucial step in network management for businesses and organizations. A domain allows centralized management of users, computers, and resources within a network, enhancing security and streamlining administrative tasks. Whether you're adding new client machines or integrating servers, joining a domain ensures that your devices are under the control of the domain's Active Directory.
In this guide, I will walk you through the process of connecting a Windows computer or server to a domain. We will cover the prerequisites, how to configure your system, and what to expect once you're part of the domain. By the end of this tutorial, you'll have successfully connected your device to a domain, ready for centralized network management.
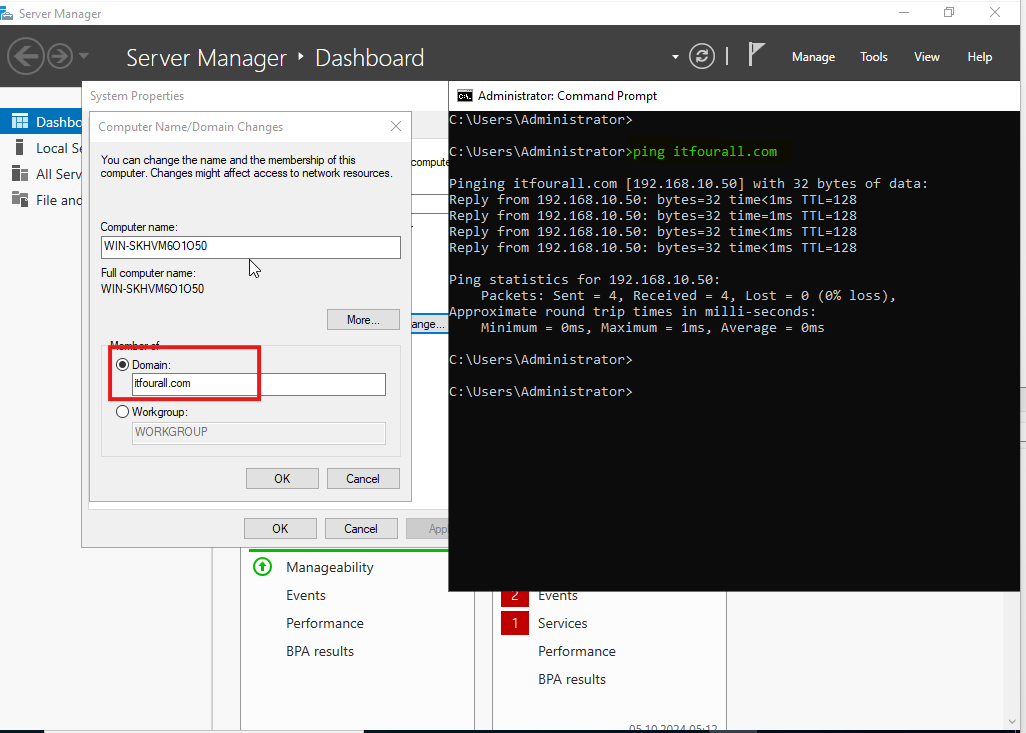
In this guide, I will show you how to add a Windows Server 2022 to a domain, but the process is similar across all Windows systems.
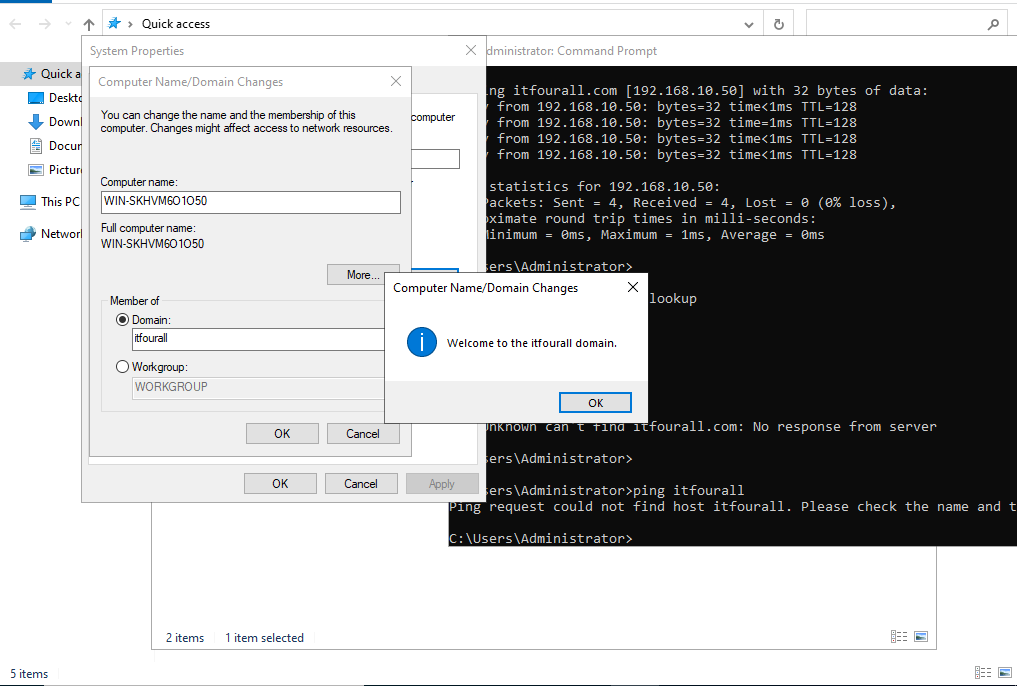
Enter the domain name and make sure it resolves to the correct IP address. If there are any issues, check your DNS server to verify that the DNS name is correctly registered. I always test with a "ping" command first to ensure it works.
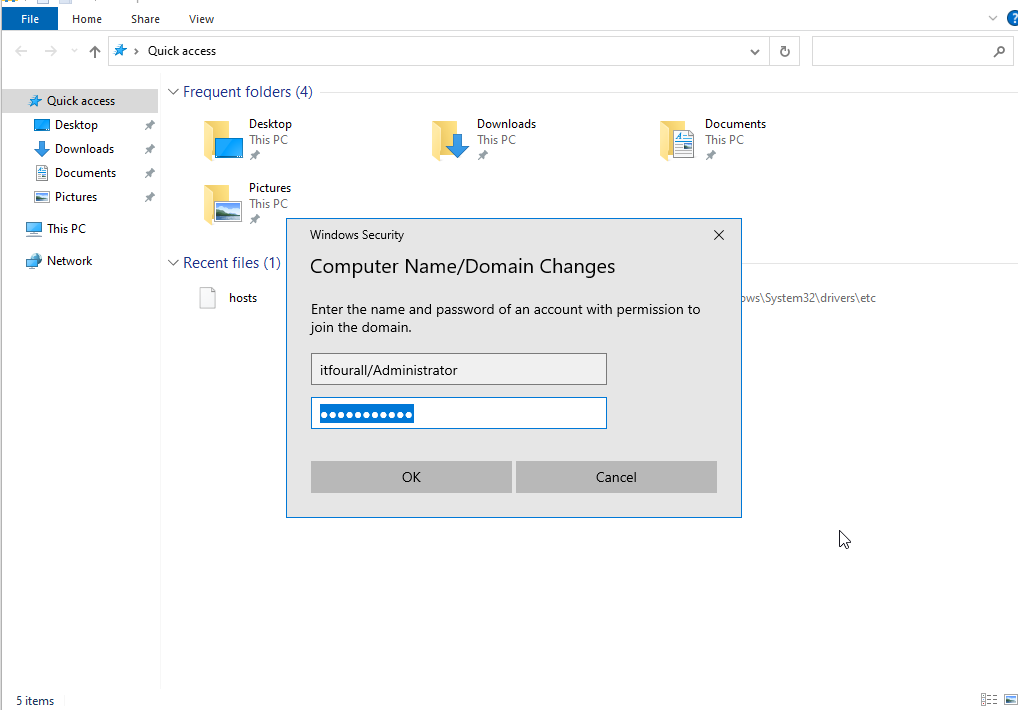
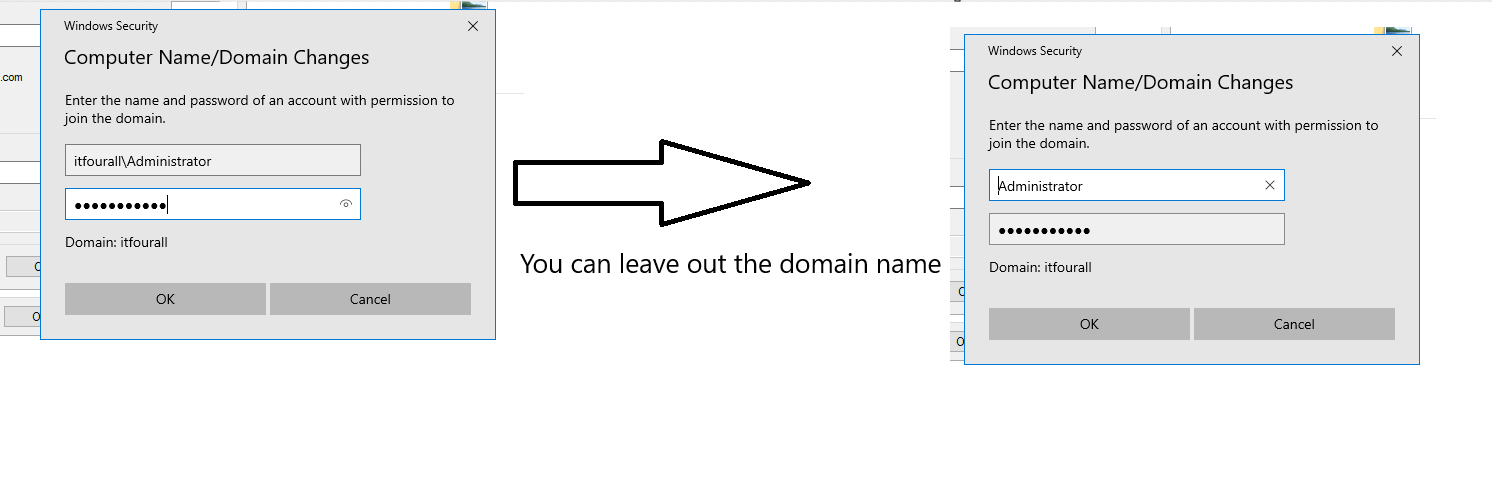
Now, enter the domain Administrator account and password.
Troubleshooting
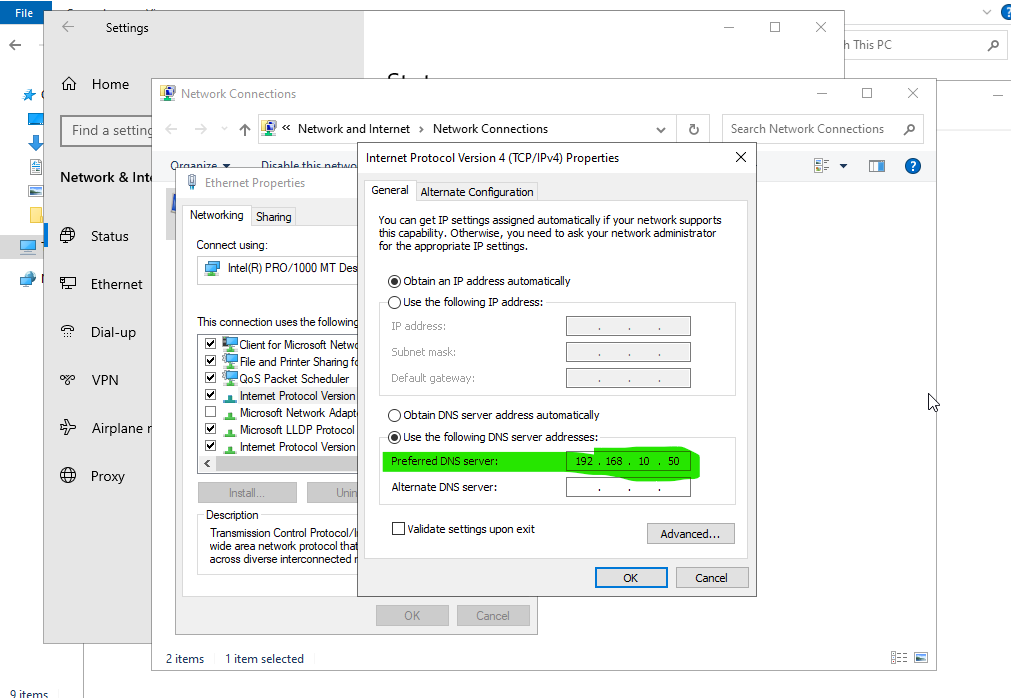
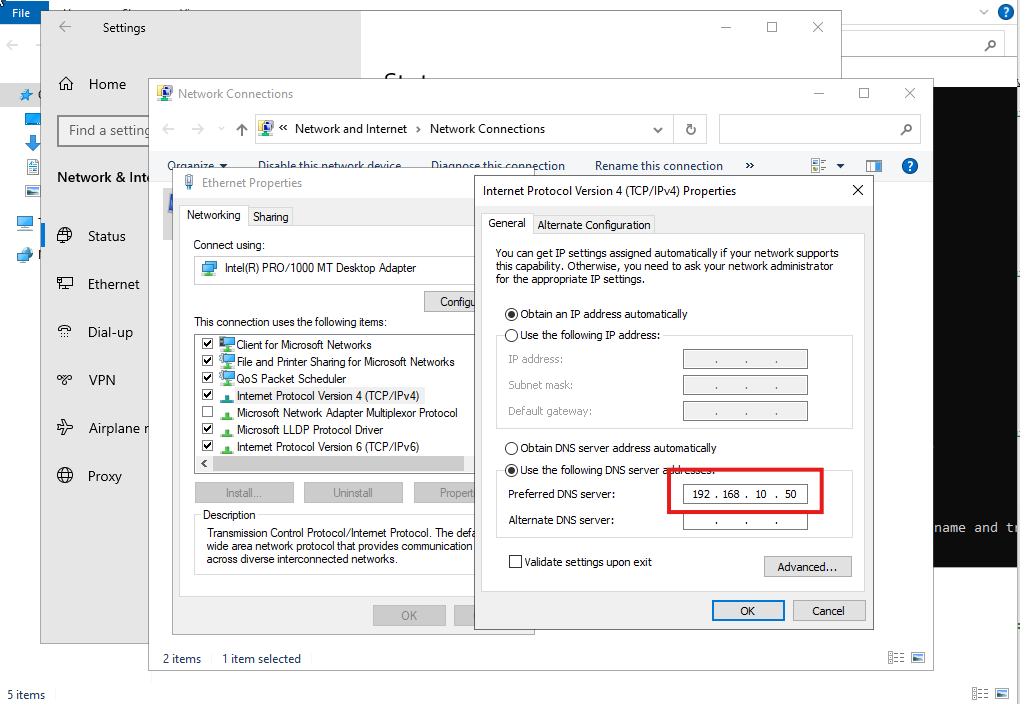
It is recommended that the Domain Controller also acts as the DNS server to ensure proper domain name resolution. Then, enter the IP address of the DNS server, which is also the Domain Controller, in the network settings.
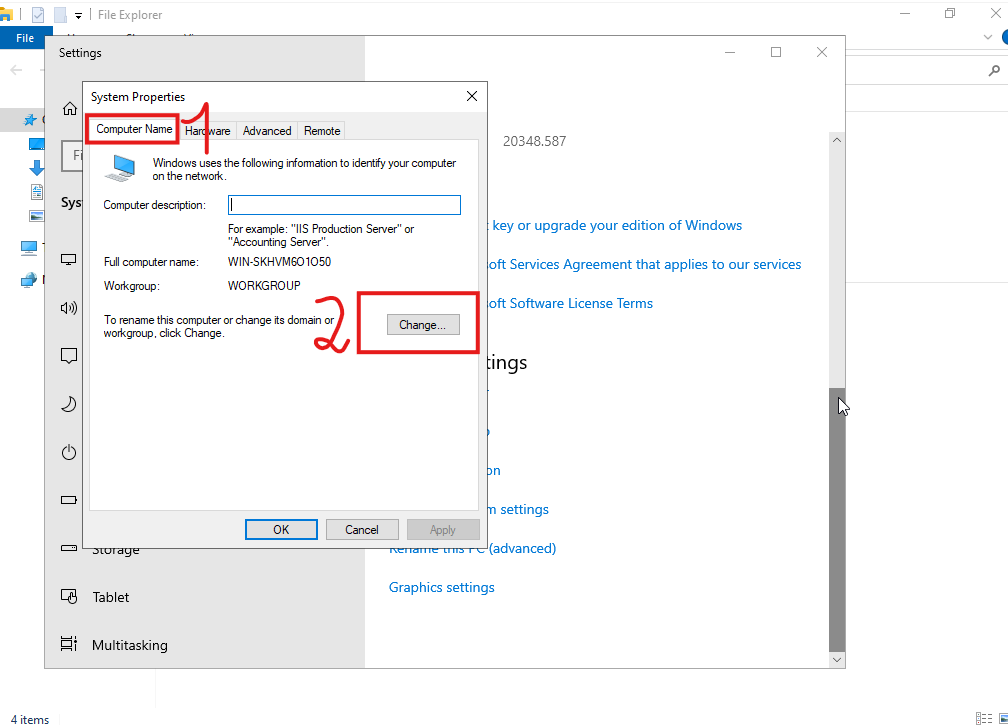
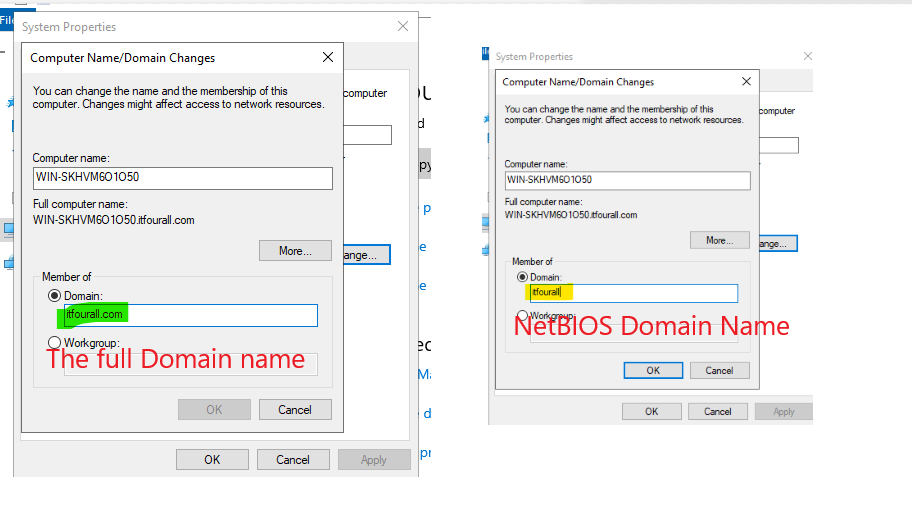
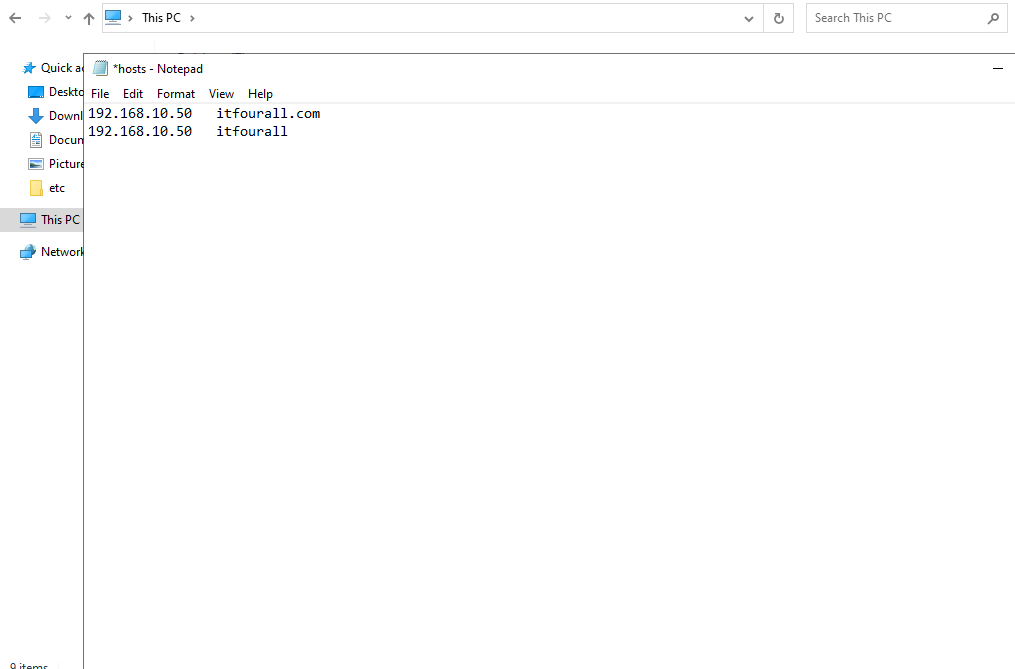
Use only the NetBIOS name. For example, the domain name is itfourall.com, but you can omit the extension, leaving only the NetBIOS name itfourall. This NetBIOS name can be viewed in the Domain Controller.
When the login screen appears, the Domain Administrator's username must be entered. If you encounter any issues, try entering the username without including the domain.
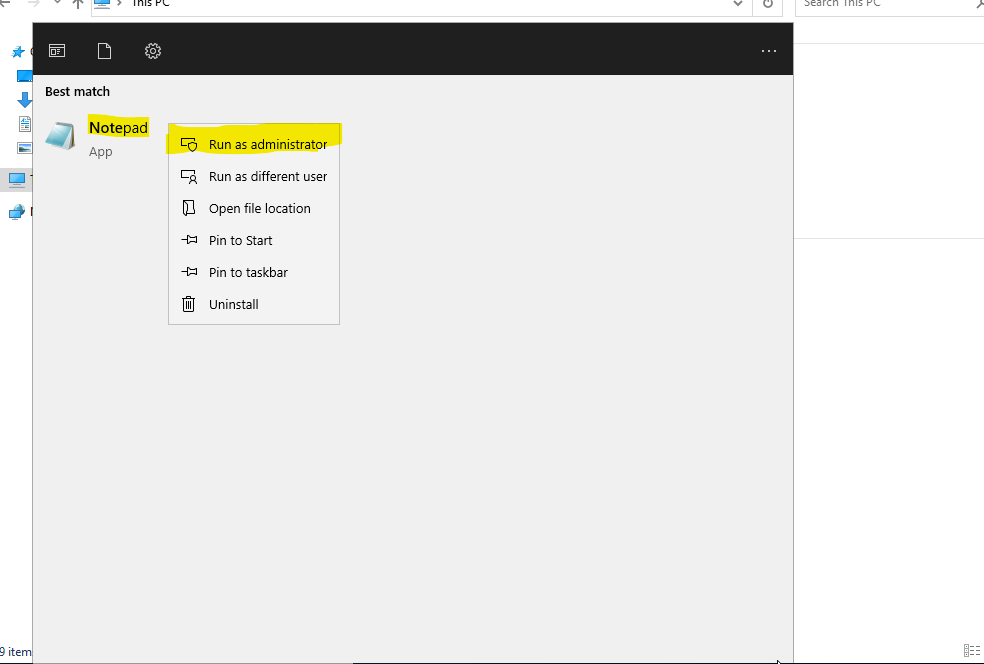
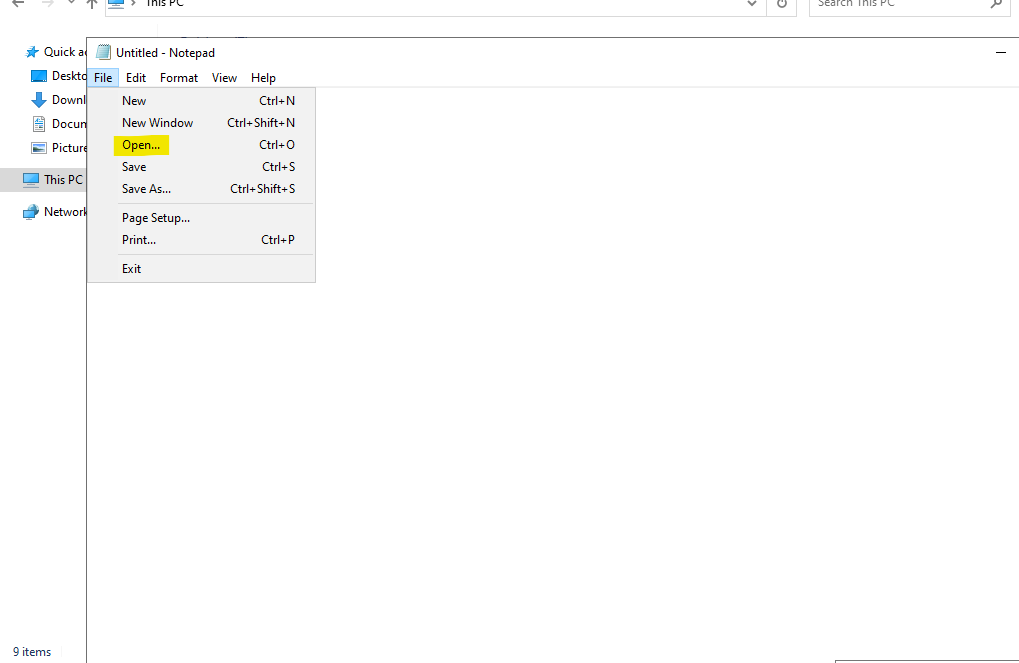
If there are issues with DNS resolution, you can also add the DNS name to the localhost file. To do this, open Notepad (which is pre-installed on Windows systems) as an administrator, and add the IP address of the Domain Controller along with its corresponding DNS name. However, make sure to still set the Domain Controller as the DNS server in the network settings.
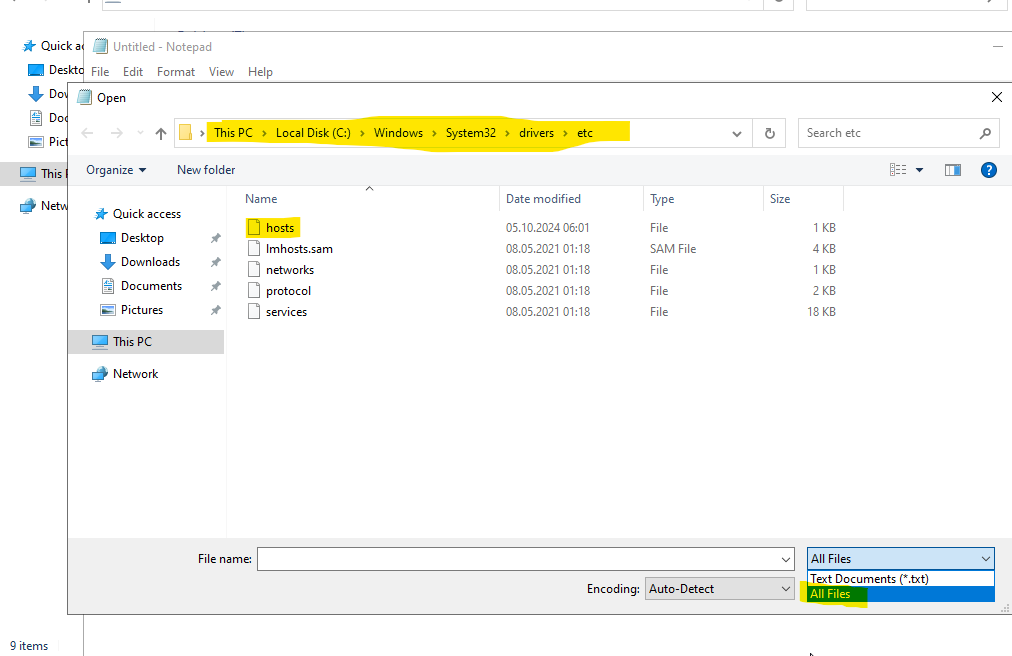
Before a DNS query is sent to the DNS server, the system will first check the DNS name in the localhost file.
Set the Domain Controller as the DNS server. It is important that a DNS service is running on the Domain Controller to prevent DNS issues.